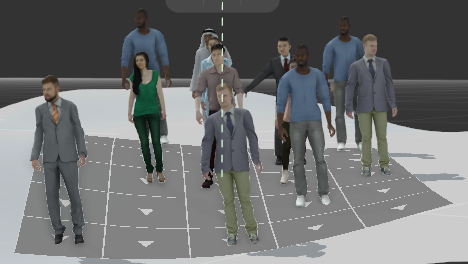
Area objects provide a simple way to place and simulate groups of static characters in your scenes with advanced control over the placement and orientation of characters using two modes. Grid mode distributes Actors in the cells of a highly configurable grid, perfect for creating ranks of seated and standing characters. Marker mode allows you to create sociable characters that congregate around points that can be placed anywhere in your scene. As with all objects in Anima, individual Actors can be adjusted manually to get the perfect result.
Anima introduces the concept of socialization. Socialized characters are able to leave a walkway and accumulate on an area creating a much more realistic sequences of animation that really bring your spaces to life. The socialization controls give you the ability to decide the number of actors that will leave the walkway to socialize , the length of time they spend there, the parts of the area they head for, and much more. Best of all, creating socialized characters is as easy as overlapping an Area and a Walkway.
Areas can also be projected onto background models make creating static character on uneven topology or even filling a stadium with an animated crowd a cinch.
To see examples of some of the features discussed in this section you will find the following sample scenes accessible from the Welcome Screen.
- Square.ani
Small groups of character in this scene demonstrate how the Cluster Points feature can create actors that appear to be talking in groups. - Tribune.ani
The audience in this scene shows how an area can be projected onto a background model to very quickly created a detailed animated audience.
Procedures
To create a new area
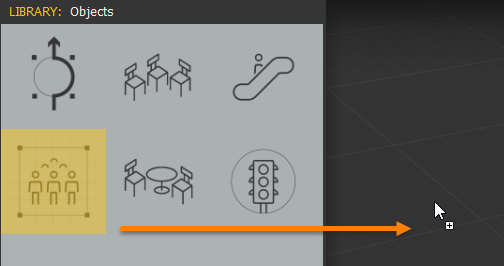
- Click and drag the Square Area Preset found in the Objects Library panel into the 3d viewport and release the mouse.
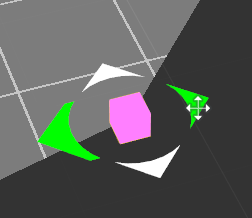
- Move the mouse to change the location of the object and click to drop the object into the scene.
- Click and hold to change rotation of the object, or right click to cancel, and the object won´t be created.
To edit the shape of an area
To change the size of a square area:
- Select the Area and go to the Properties Panel.
- Set the length and width of the square using the Area > Size property.
To Create a Circular Area:
- Select the Area and go to the Properties Panel.
- Change Area > Area Mode, switch from Polygon to Circular.
- Set the radius of the Circle using the Area > Size property.
To Create an nGon area:
- Select the Area and go to the Properties Panel.
- Change Area > Area Mode to Polygon.
- Set the size of the nGon using the Area > Size property
- Set the number of corners using the Area > Vertices property.
To move existing vertices:
- Select the Area.
- Select a vertex in the 3d viewport.
- Use the 2d transform gizmo to move the vertex to a new position.
To add new vertices to a shape with the mouse:
- Select the Area.
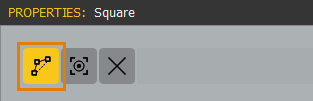
- Click the Refine Polygon tool found at the top of the Properties panel.
- Move the mouse over an edge in the 3d viewport, you will see a live preview of the new shape.
- Click to add the new vertex.
- Right click to finish.
To add actors to an area
To add individual actors manually to a walkway:
- Select an Actor from the Library: Actors panel.
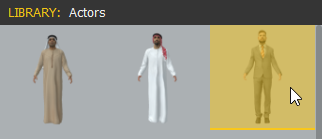
- Click and drag the actor into the 3d viewport and release the mouse. Move the character over the area until the mouse pointer change into a link icon and click to place the actor.
To add multiple automatically distributed characters to an area or a walkway:
- Select an Area in the 3d viewport.
- Go to the Properties Panel.
- Drag actors from the Library Actors panel to the Crowd List in the Properties panel.
Note. If you leave the Crowd List empty it will automatically use the full library.
(Use control and click on multiple actors or use shift and click the first and the last actor to select all the range in between.) - Use the Actors Count property to enter the number of characters you’d like to create on the selected walkway. Alternatively to fill all available spaces on the area, turn on Fill All Slots.
- Click Generate to create the characters.
To create an area that is used by characters on a walkway
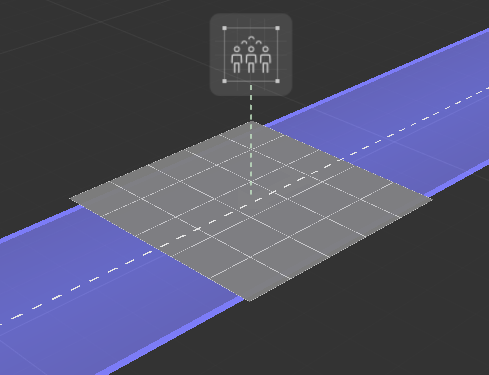
When you place an area so that it overlaps a walkway you are able to have characters deviate from their usual path and interact with the area. When actors do this we say they are socializing. Setting this simulation up is simple, just follow these steps:
- Create an Area as describe above but place it so that it overlaps a walkway.
- To set the type of motion for actors to perform on the area, drag a new choice from the Library: Motion Clips panel to the Area’s Object > Motion Clip /Category parameter. Alternatively skip this step to use the area’s default behavior.
(Select all the motion clips by dragging the category or tab)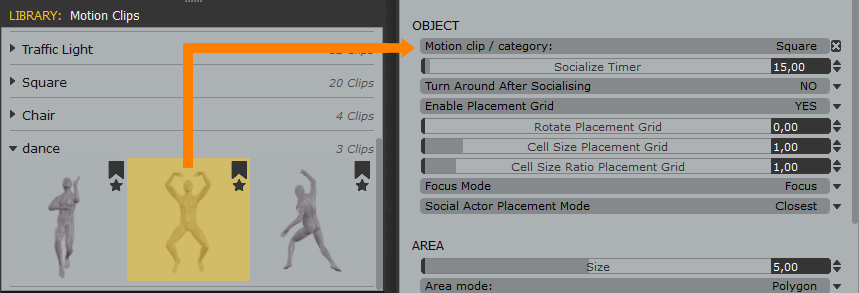
- To decide how many characters interact with the Area, select the Walkway and adjust the Actor Socialization value. This controls the probability of an actor using the walkway. At 0% no actors will use the area, at 100% all actors will use the area. Once you’ve adjust this value, Click Generate to recreate the characters.
- If you select the Area, you now have several options to help you control the socializing animation. Set the Socialize Timer parameter to control how much time characters spend in the area.
- Turn on Turn Around after Socializing to have the characters turn through 180 degrees when they have finished socializing.
- Set Social Actor placement to control which part of the area Actors will move to in the direction they are already traveling. Choose Closest and they’ll go to the nearest available empty space, or choose Furthest and they’ll head to the most distant available empty space.
Note. To set a different socialization probability for each area you can use the Area Properties > Override Socialization parameter. This will allow you to create multiple areas on a walkway, each with a different probability of being used by a character.
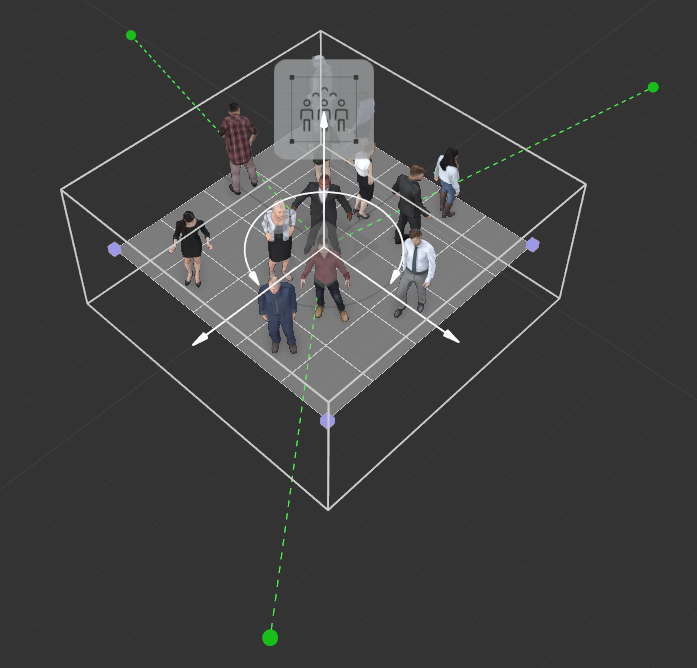
To control the distribution of actors on an area using the grid
Anima distributes actors on areas using one of two modes, either grid mode or marker mode. In grid mode, the area is divided into a 2d grid and each cell has the potential to contain a single character. This mode it particularly well suited to distributions like crowds, audiences, and tiered seating where a relatively regular distribution is encouraged by the architecture.
To use this mode.
- Create a new Area or select an existing one from the scene.
- Go to the Properties panel and change change Enable Placement Grid to Yes.
- Change the size of the grid using the Cell Size property.
- Change the aspect ratio of the grid using the Cell Size Ratio Grid property.

- To determine how many people to place on the grid, set the Actor Count property. If you’d like to place a person in every cell, change the Fill All Slots option to Yes (This will also show you how many slots are available).

- To add some position randomization to the characters, set a minimum and maximum value for the Position Shuffle property. This will help create a more natural distribution.
- Finally, click Generate to create the Characters.
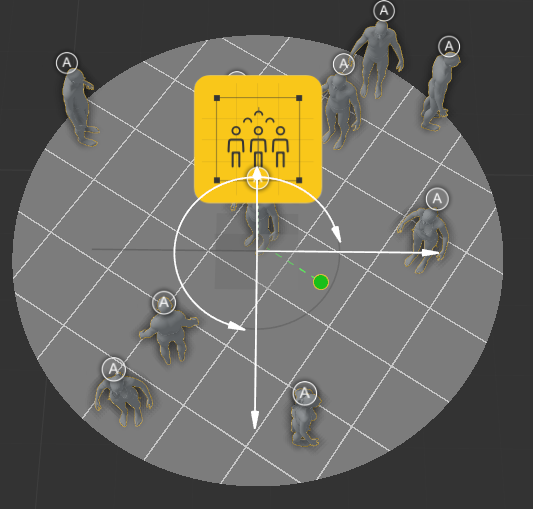
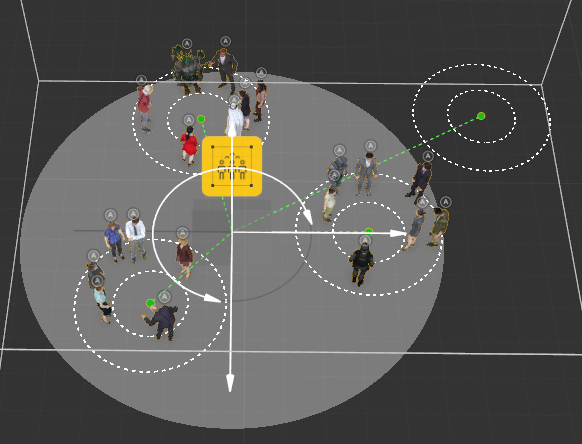
To control the distribution of actors on an area using point markers
Anima distributes actors on areas using one of two modes, either grid, or Markers mode. In marker mode, characters are randomly placed between two concentric rings surrounding one or more focus points.
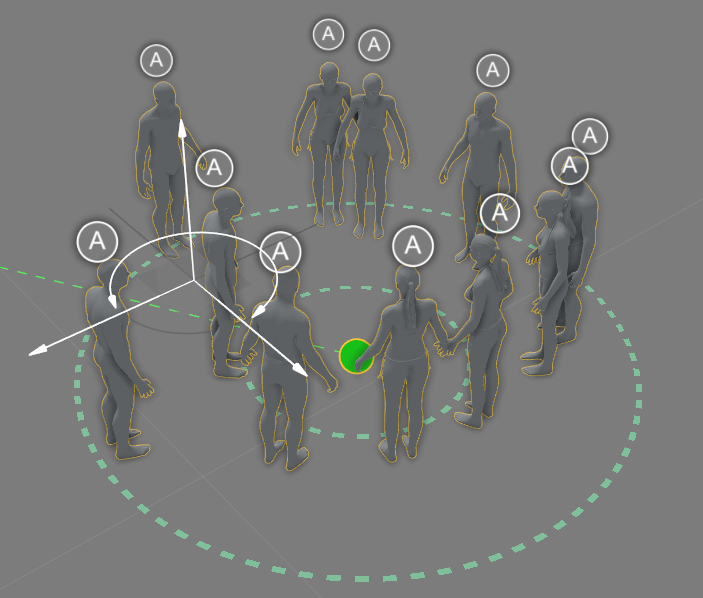
If there are multiple Markers, Anima will only place actors on the ones that are inside the area.
To use this mode:
- Create a new Area or select an existing one from the scene.
- Go to the Properties panel and change change Enable Placement Grid to No.
- Click on the Add Object Point button at the top of the Properties panel.This tools allows you to add points simply by clicking in the viewport.
- Click anywhere inside the area boundary to add an Object Point. Keep clicking to add additional Points.
- Right Click or Deselect the Add Object Points tool to exit creation mode.
- Set the size of the placement rings around object Points using the Cluster Inner/Outer radius slider. Characters will be distributed between these two rings.
- Click Generate to create the Characters.
To control the direction actors are facing
You can control the direction of characters using one of 3 automatic methods, either rotate them randomly, use the grid to make them all face in the same direction, or use object points as look-at targets.

To randomly rotate actors:
- Set Focus Mode to Fixed.
To create characters that look at one or more focal points:
- Set Focus Mode to Focus.
- Click on the Add Object Point button at the top of the Properties panel.
- Click anywhere in the 3d viewport to add a look-at target . Keep clicking to add additional Points.
- Right Click or Deselect the Add Object Points tool to exit creation mode. If there are multiple points character will rotate to face the point that’s nearest to them.
To create characters that face in a single direction:
- Set Focus Mode to Grid.
- Use the Rotate Placement Grid property to control the direction that the actors face.

To randomize motion clip phase
- Select the area in the 3d viewport or from the Project Panel.
- Each character’s motion clip can be randomly offset to create more realistic variation. To set the range for the offset values go to the Properties panel and use the Actor Animation Phase Random Minimum and Maximum properties.

To assign different motion categories to an area
To assign a Motion Clip or Motion Category to an area:
- Select an Area in the 3d viewport or using the Project Panel.
- Go to the Properties panel.
- Drag a new Motion Clip or Category to the Motion Clip/Category slot.
To create an area on a background model
Areas can be projected onto the surface of a background model to create characters that stand or sit on nearly any type of geometry.
- Import a background model.
- Click and drag the Square Area Preset found in the Library Presets panel into the 3d viewport and release the mouse.
- Move the mouse over the background model and click to drop the object into the scene. The area will automatically conform to the surface of the background model.
To create seated characters on a background model
By simply importing the seating area from your architectural model, adding huge and varied animated crowds can be done in minutes. Just follow these steps:
- Import a background model that contains the geometry on which you’d like the characters to be seated
- Click and drag the Square Area Preset found in the Library Presets panel into the 3d viewport and release the mouse.
- Move the mouse over the seats in the background model and click to drop the object into the scene. The area will automatically conform to the surface of the background model.
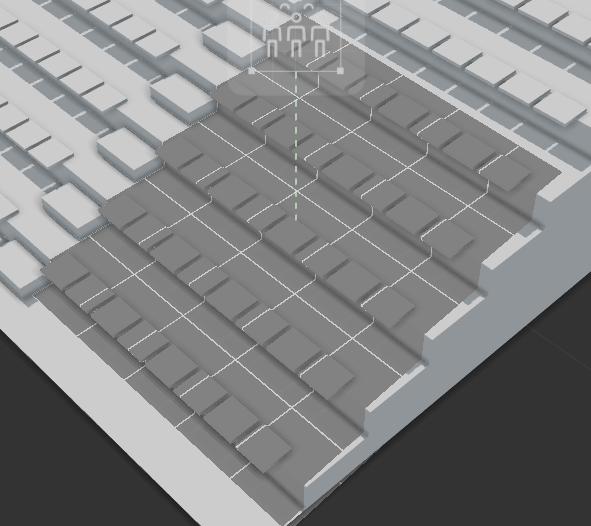
- Edit the shape of the area to fit the seated part of the background model.
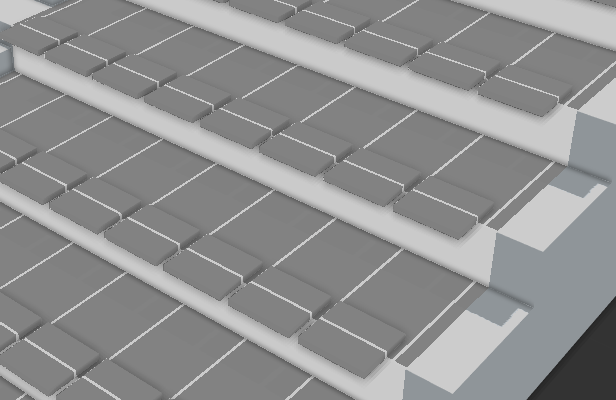
- Edit the Cell Size Placement Grid and Cell Size Ratio Placement Grid values until there is one cell per chair position.
- Change Focus Mode to Grid and set the audience’s direction using Rotate Placement Grid property. Arrows on the area show to direction that actors will face.
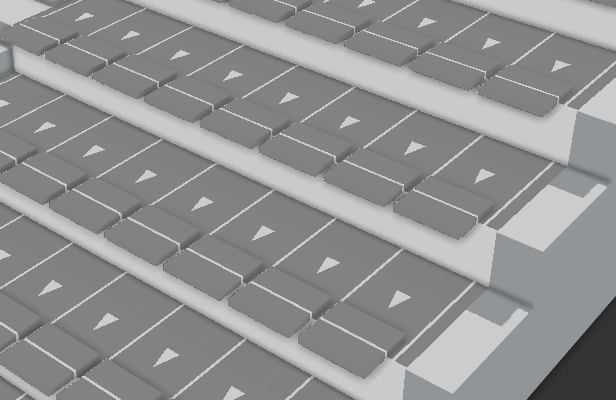
- To tell the area to create seated characters, drag the Tribune or Tribune_2 Motion Category to the Area’s Object > Motion Clip/Category slot. The tribune motion clips are designed for a lively stadium audience. For something more sedate you could also use the Chair category.
- Click Generate to create the characters and that’s it. To get them to sit perfectly on the seats you may need to move the whole area backwards and forward a little so that their feet are on the ground.
Interface
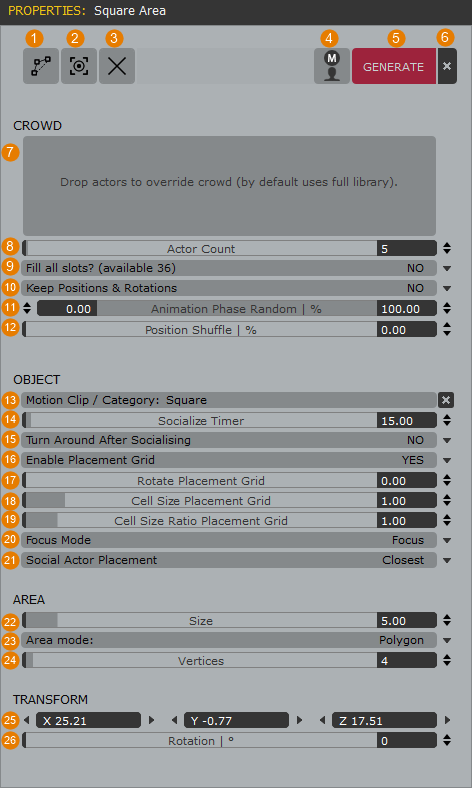
- Refine Area Edge
Click this button to activate the Area edge refinement tool. Using this you can add and place additional vertices simply by clicking in the 3d viewport.(This button is only visible when an Area mode is on polygon.)
- Create Object Point
Click this button the create a new Object Point. In grid mode these can be used as Look at Targets to determine the characters rotation. If grid mode is turned off, characters are clustered around objects points, distributed randomly between the inner and outer radius. - Delete all Object Points
Click this button to delete all this area’s object points. To delete them individually, select in the viewport and press the delete key or right-click and select Delete. - Set all Actors to manual
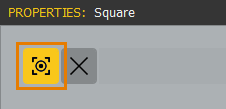
Click this button to set all actors to manual placement mode. Once you do this the Area properties will no longer affect these characters. - Generate
Click Generate or update actors using the current distribution settings. If characters have already been generated , clicking this button again will create a new random distribution. - Delete All Actors
To delete all the generated actors click the X button. - Crowd List
Contains a list of all the actors to be distributed on the area. Drag selected characters to the list from the Actors panel or leave it blank to use the full library. - Actor Count
The number of actors to create on the area. - Fill All Slots
Set this to Yes to fill all the available positions on the area. In this mode the Actor Count value is ignored and one character is created for each square on the grid.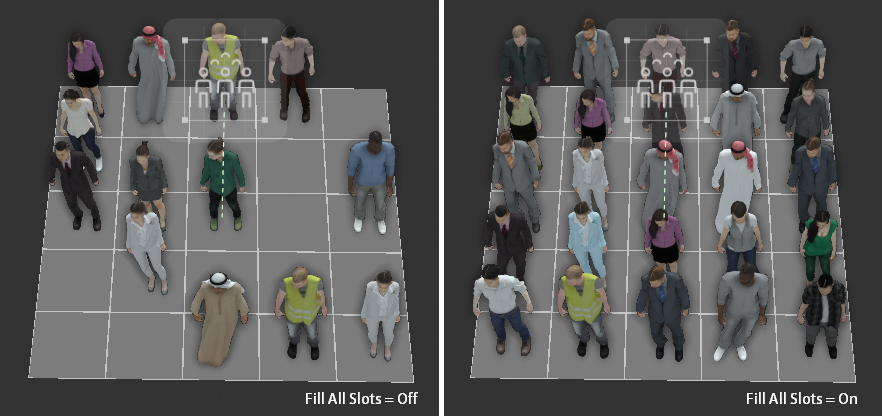
- Keep Positions and Rotations
When this is set to No, clicking Generate will create a completely new distribution. When set to Yes the Position and Rotation of current actors will be retained but motions, color variations and phase control will be randomized. - Animation Phase Random
Defines the range of motion clip phase offset that will be randomly applied to each actor. - Position Shuffle / Cluster Inner/Outer Radius
Add a random radial translation to characters after they have been placed. When using Object Points these values define the inner and outer radius within which actors can be placed. In order for Actor Cluster mode to be activated Enable Placement Grid must be set to Off.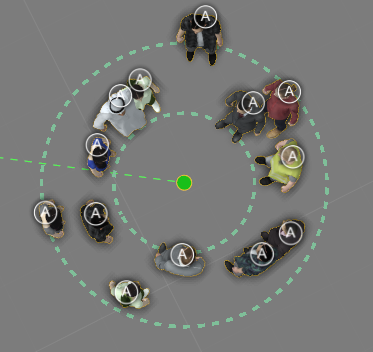
- Motion Clip Category
Used to assign a Motion Clip or Motion Category to the area.. - Socialize Timer
The time measured in seconds that socialising characters will spend on the area before returning to the walkway. - Turn Around After Socialising
If this is set to On, the actor will turn around when finished socialising. If this is set to Off the actor will walk forwards. This can be useful if you need to stop actors walking through an object around which they are clustered. - Enable Placement Grid
Toggles between Grid Placement mode and Cluster mode. In the Grid Placement mode actors are placed in squares created using a grid defined by the Cell Size, Cell Ratio and Grid rotation properties. IF this is off actors cluster around points created using the Object Point tool.

- Rotate Placement Grid
Rotate the placement grid. Note that the placement grid is rotated inside of the area shape. - Cell Size Placement Grid
Set the cell size of the placement grid. Use this value to increase and decrease the size of the squares. - Cell Size Ratio Placement Grid
Sets the cell’s aspect ratio for the placement grid. A value of 1 is square, values greater than one stretch the cell vertically and values less than 1 stretch the cell horizontally. - Focus Mode
Allows you to choose a mode to set the rotation of actors. You have 3 choices. In Focus mode the actors rotate to face the neartest Object point; in Grid mode actors are aligned to the orientation of the grid, this is marked by arrows; finally in Random mode actors are randomly rotated.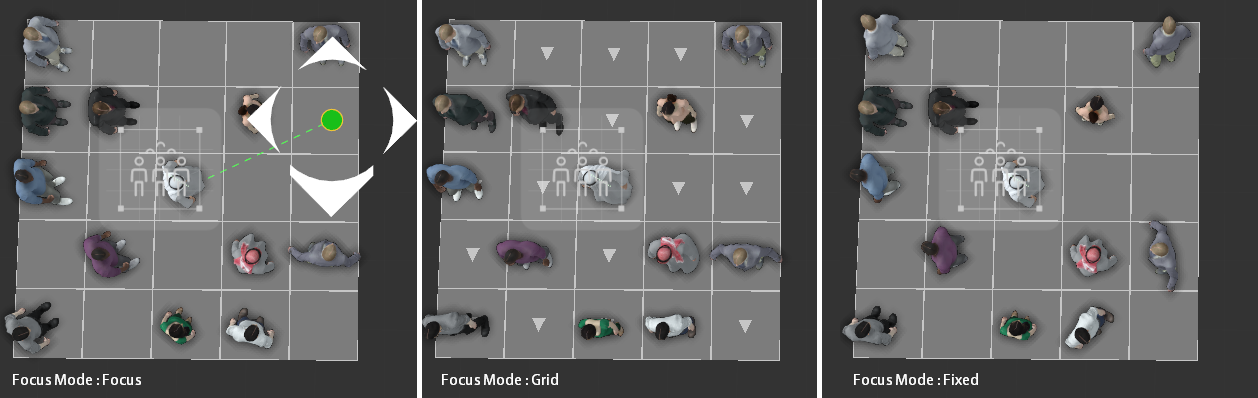
- Social Actor Placement
These options determine what part of an area actors walk to when leaving a walkway. If this is set to Nearest the actor will go to the closest empty part of the area, if the parameter is set the Furthest the character will continue to an empty part of the area that’s most distant from them in the direction they are walking.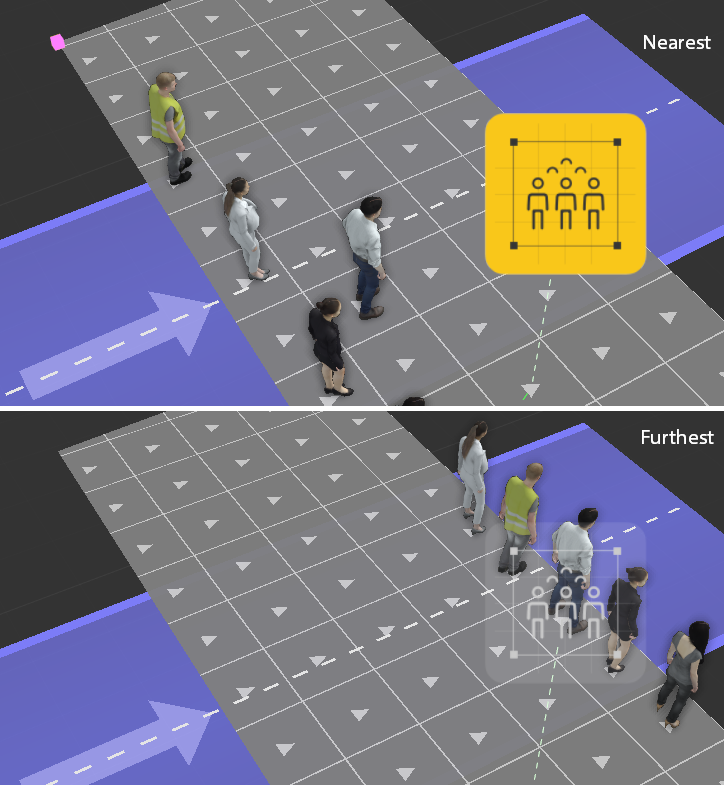
- Radius/Size
Sets the the length and height of a polygonal area, or the radius of a circular area. - Area Mode
Sets the area shape. Choose from Circle or Polygon. If polygon is selected the shape will be an nGon that uses the vertex count value to determine the number of sides. - Vertices
Sets the number of vertices for a polygonal area. - Translation
The position in world space of the area. You can use these values to adjust the position, or alternatively you can use the selection tool in the 3d viewport. - Rotation
The rotation of the area. When using Focus Mode > Grid, this will also determine the direction the characters are facing.