The Avoiding preset is a special type of Area that is used in conjunction with Walkways to define an obstacle that characters will walk around. Like any Area, obstacles can be any shape and size and will project onto any background models in your scene.
Procedures
See the Areas section for general information about changing the size, position and shape of avoiding areas. Below you will find only the procedures that are unique for avoiding Areas.
To create an obstacle on a Walkway
Assuming you already have a walkway in your scene and you’d like to create an area for walking characters to avoid, follow these steps:
- Click and drag the Avoiding Area Preset found in the Library Presets panel into the 3d viewport and release the mouse.
- Move the mouse over the walkway to position the Avoiding area and click to drop the object into the scene.
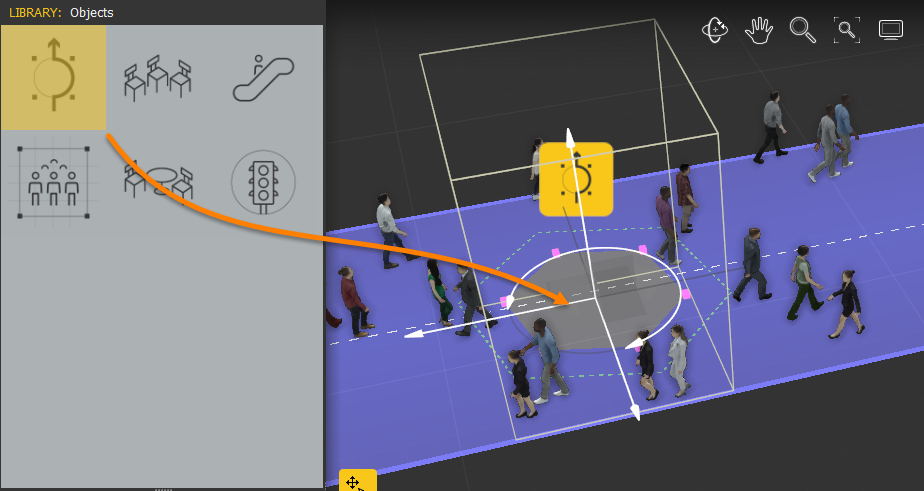
- Go to the Properties Panel and enter a value for the Hull Offset parameter. This value defines a collision area around the walkway, Any characters that enter this area will be steered around the obstacle.
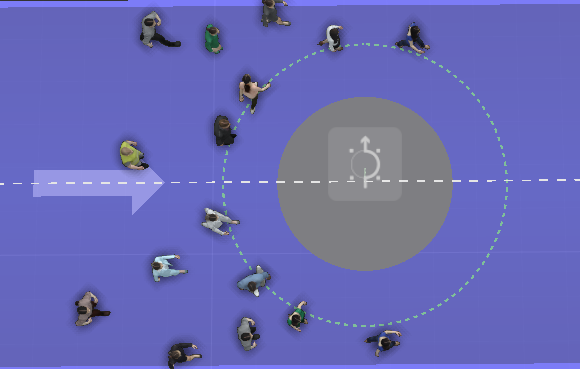
To create walking characters that circle an obstacle
Avoiding areas have an alternate mode that “Captures” any characters that come into contact with it. When this mode is active any character that enters the collision area walks around the perimeter of the obstacle for the remainder of the animation. To use it:
- Create a Avoiding Area as described above.
- Go to the Area’s properties and turn on Keep Walking.
Interface
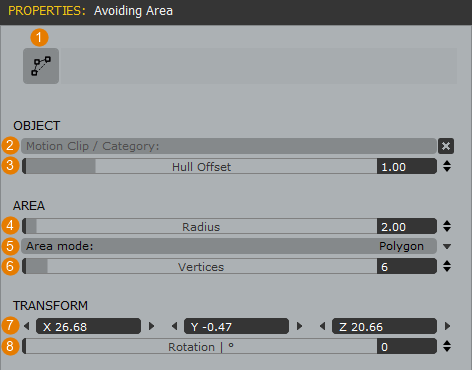
- Motion Clip/Category
Used to assign a Motion Clip or Motion Category to the area.. - Hull Offset
The value controls the size of the capture area and path that actors will use to avoid the obstacle. Actors outside this area will ignore the obstacle, actors that walk into this area will use this path to negotiate their way around it. - Radius
Sets the the length and height of a polygonal obstacle, or the radius of a circular obstacle. - Area Mode
Sets the obstacle shape. Choose from Circle or Polygon. If polygon is selected the shape will be an nGon that uses the vertex count value to determine the number of sides. - Vertices
Sets the number of vertices for a polygonal area. - Translation
The position in world space of the area. You can use these values to adjust the position, or alternatively you can use the selection tool in the 3d viewport. - Rotation
The rotation of the area. When using Focus Mode > Grid, this will also determine the direction the characters are facing.