Anima makes it easy to reuse assets. Using the preset system, any object or combination of objects and parameters can be added to the Library for easy retrieval. Any presets you create will be available for every scene in your project, saving you hours of time recreating regularly used items.
Procedures
To create a new Preset
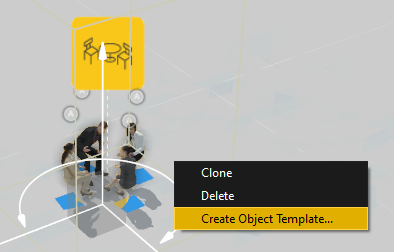
- Select the objects you wish to save to a preset by picking them in the 3d viewport. To select multiple objects, hold down shift while clicking. In this example I’ll create a template from this table of 4 chairs.

- Right-click and select Create Object Template.
- The Create Template menu will Open. Enter a title for your preset in the Name field.

- Pick a preview image. You can select from the existing images or load one from disk by clicking the + icon.
- Click Save. Your new object will now be available from the Library Presets panel. Hover mouse over the icon to see the name and a preview image.

To use a custom Preset
Custom presets are used in exactly the same way as the built in objects. To use them:
-
- Click and drag a Custom Object from the Library Presets panel into the 3d viewport and release the mouse.
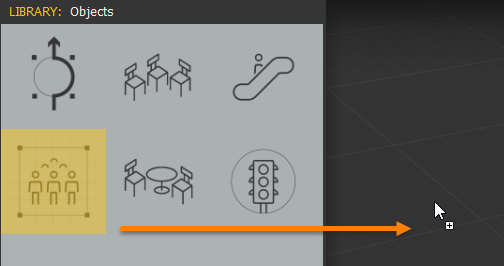
- Move the mouse to change the location of the object and click to drop the object into the scene.

- Add as many presets as you need to quickly populate your scenes!

- Click and drag a Custom Object from the Library Presets panel into the 3d viewport and release the mouse.