Motion Mixer will allow you to combine multiple sets of MOCAP files to create longer sequences with varied motions and blend them together similarly to a video editing programme.
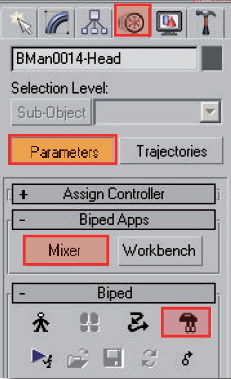
- Select a character bone, click on Motion
 and then on the Mixer mode
  icon in the Biped rollout menu. Press the Mixer button in the Biped Apps rollout menu to display the Motion Mixer Graph.
NOTE When you open the Motion Mixer you’ll see a track for each Biped in the scene. The tracks are labelled with the name of the Biped.
- Right-Click on a blank area of the Motion Track and select Convert to Transition Track. A Transition Track consists of three slots. The upper and lower slots are for .bip files, and the middle slot holds a
transition between the two.
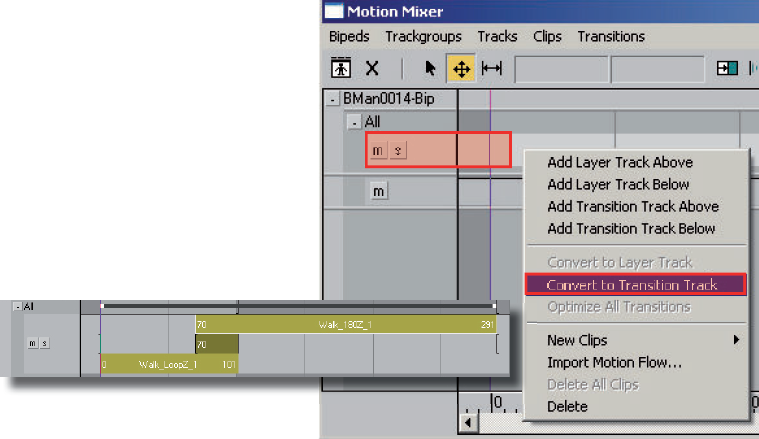
- Right-Click on the track again and choose New Clips > From Files. Load the first motion clip on your animation sequence and repeat this step with the rest of the .bip files you intend to use in your project. To make the active time segment be long enough for all the animation click on the Set Range
 button. Use Zoom Extents
  in the Motion Mixer toolbar to see the animation in its totality.
 - In the middle slot a transition between two consecutive motion clips was created. Right-Click on a transition and choose Edit to bring up the Transition Editor. Set the starting frames on each clip, and the length of the transition to line up the two clips as best as possible.
The Transition Editor is the same as in the Motion Flow Mode. Remember that you can also use the Optimize ![]() tool to search for a smooth transition.
tool to search for a smooth transition.