Anima give you two ways to create seated characters. You can either add individual chair objects to the scene and then place a character on them manually. Or you can use the Table preset object that lets you quickly add groups of chair and takes care of placing and randomizing characters automatically. Chair objects automatically move to the surface of a background model so you can import the chair models from your 3d package for quick and easy population with seated actors.
Procedures
Note. If you want to place characters on existing chairs in your scene, import a background model that contains this geometry. If you want to place the chairs under your characters afterwards, make sure you set the correct seat height using the Height Offset parameter.
To create an individual chair
- Click and drag the Chair object found in the Library Presets panel onto the 3d viewport and release the mouse.
- Move the mouse to change the location of the object and click to drop the object into the scene. If you have a background object the Chair will snap to the surface.
- If you’re not using a background model, set the chair’s seat height using the Height Offset value.

- To add a character to the chair, drag a model from the Actor Library to the 3d viewport and release the mouse
- Move the mouse to until the actor is on top of the chair object and a link icon is displayed. Click to link the actor to the chair.
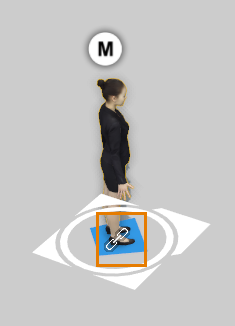
- The actor is now locked to the chair and moving or rotating the chair object will also
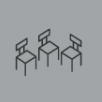
To create a group of chairs
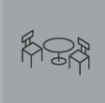
- Click and drag the Table object found in the Library Presets panel onto the 3d viewport and release the mouse.
- Move the mouse to change the location of the object and click to drop the object into the scene. If you have a background object the Table will snap to the surface.
- The table object is used to control to properties of a number of chairs.To edit these properties and create chairs, go to the Properties Panel.
- If you’re not using a background model, set the chair’s seat height using the Height Offset value.
- Drag actors from the Library Actors panel to the Crowd List. Remember that if you leave the Crowd List empty it will automatically use the full library.
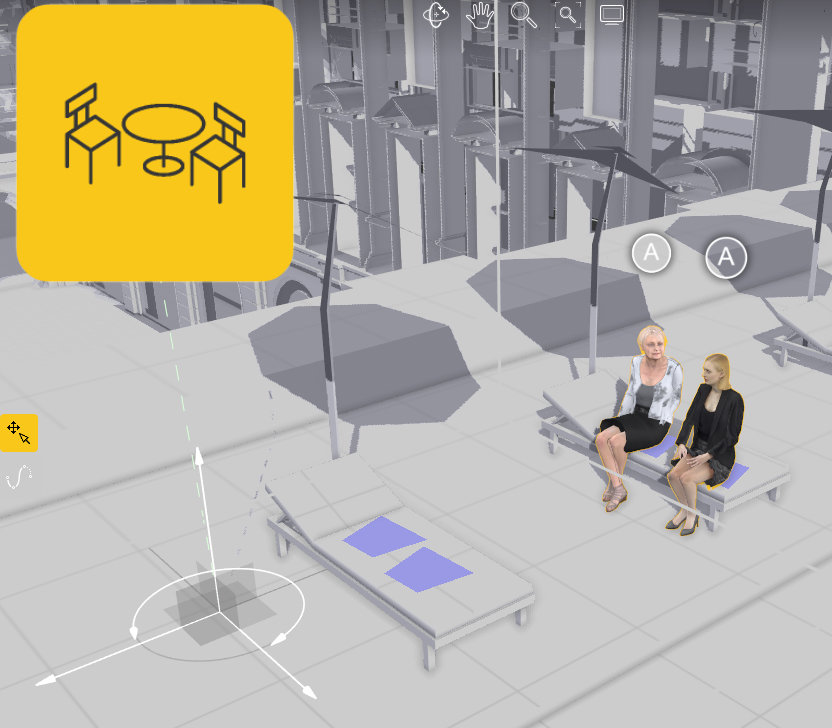
- To place the chairs click on the Create Chair button. Click in the viewport to place a chair or click and drag in the viewport to create a chair and adjust its rotation by holding click. Repeat this process until you’ve added the chairs you need and then right-click to exit creation mode.

- Enter the number of characters to create using the Actor Count property or to fill all the chairs turn on Fill All Slots?.
- Click Generate to create the character.
NOTE If you have an individual chair that you create manually and you’d like to add it to a table you can do this by dragging the chair onto the table until the link icon appears. Release the mouse and the chair is now connected to and controlled by the table.
To delete a Chair from a table group
- Select the chair in the 3d viewport or the Project Panel
- Press the Delete-key or right-click and select Delete.
Interface
The Chair preset
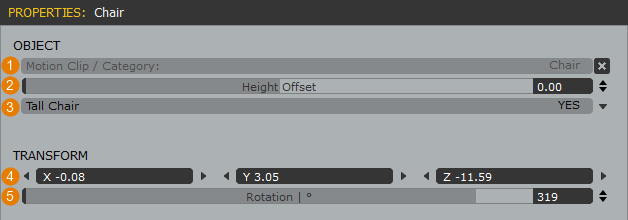
- Motion Clip/ Category
Used to assign a Motion Clip or Motion Category to the area. - Height Offset
Offsets the character above the Chair marker. This is useful if you want to create characters but you don’t yet have a background model to set the seat height. Using this you could for example place the characters in anima and add the seats in afterward in your 3d application. - Tall Chair
Turn on this option if the characters are sitting on a tall chair or stool. It alters the positioning of their legs to allow for knee angles of greater than 90 degrees. - Translation
The position in world space of the seat. You can use these values to adjust the position, or alternatively you can use the selection tool in the 3d viewport. - Rotation
The rotation of the seat.
The Table Preset
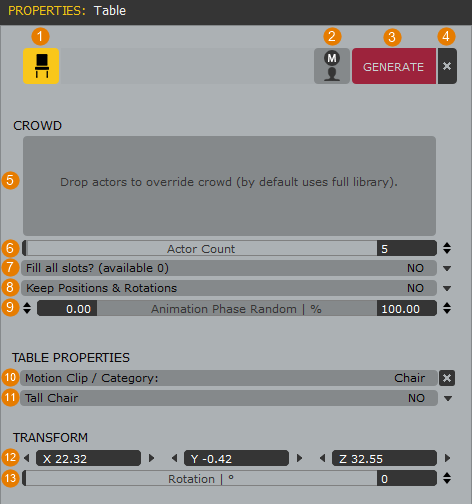
- Chair Create Mode
Click this button to turn on chair creation mode. When activated you simply click in the 3d viewport to add a new chair. Click on hold the left mouse button to place and rotate a new chair. - Set all Actors to manual
Click this button to set all actors to manual placement mode. Once you do this the Area properties will no longer affect these characters. - Generate
Click Generate or update actors using the current distribution settings. If characters have already been generated , clicking this button again will create a new random distribution. - Delete All Actors
To delete all the generated actors click the X button - Crowd List
Contains a list of all the actors to be distributed on the area. Drag selected characters to the list from the Actors panel or leave it blank to use the full library. - Actor Count
The number of actors to create on the seats. This value cannot be higher than the number of chair objects in the group. - Fill All Slots
Set this to Yes to fill all the available seats. In this mode the Actor Count value is ignored and one character is created for each chair object in the group. - Keep Positions and Rotations
When this is set to No, clicking Generate will create a completely new distribution. When set to Yes the Position and Rotation of current actors will be retained but motions, colour variations and phase control will be randomized. - Animation Phase Random
Defines the range of motion clip phase offset that will be randomly applied to each actor. - Motion Clip Category
Used to assign a Motion Clip or Motion Category to the area.. - Tall Chair
Turn on this option if the characters are sitting on a tall chair or stool. It alters the positioning of their legs to allow for knee angles of greater than 90 degrees.Applies to all chairs in the group. - Translation
The position in world space of the table group. You can use these values to adjust the position, or alternatively you can use the selection tool in the 3d viewport. - Rotation
The rotation of the table group..