Anima’s 3D viewport shows a real-time preview of the results of your animation project. It also enables you to draw walkways, create areas, place escalators and stairs, move actors, assign motion clips, adjust poses and much much more. In short the 3D viewport allows you to perform all the editing tasks necessary to quickly create impressive animations. The layout of the viewport will change depending on if you’re in Drawing mode for placing actors in the scene, or Editing mode for importing and editing characters and motion clips for the project.
The 3D Viewport in Drawing Mode
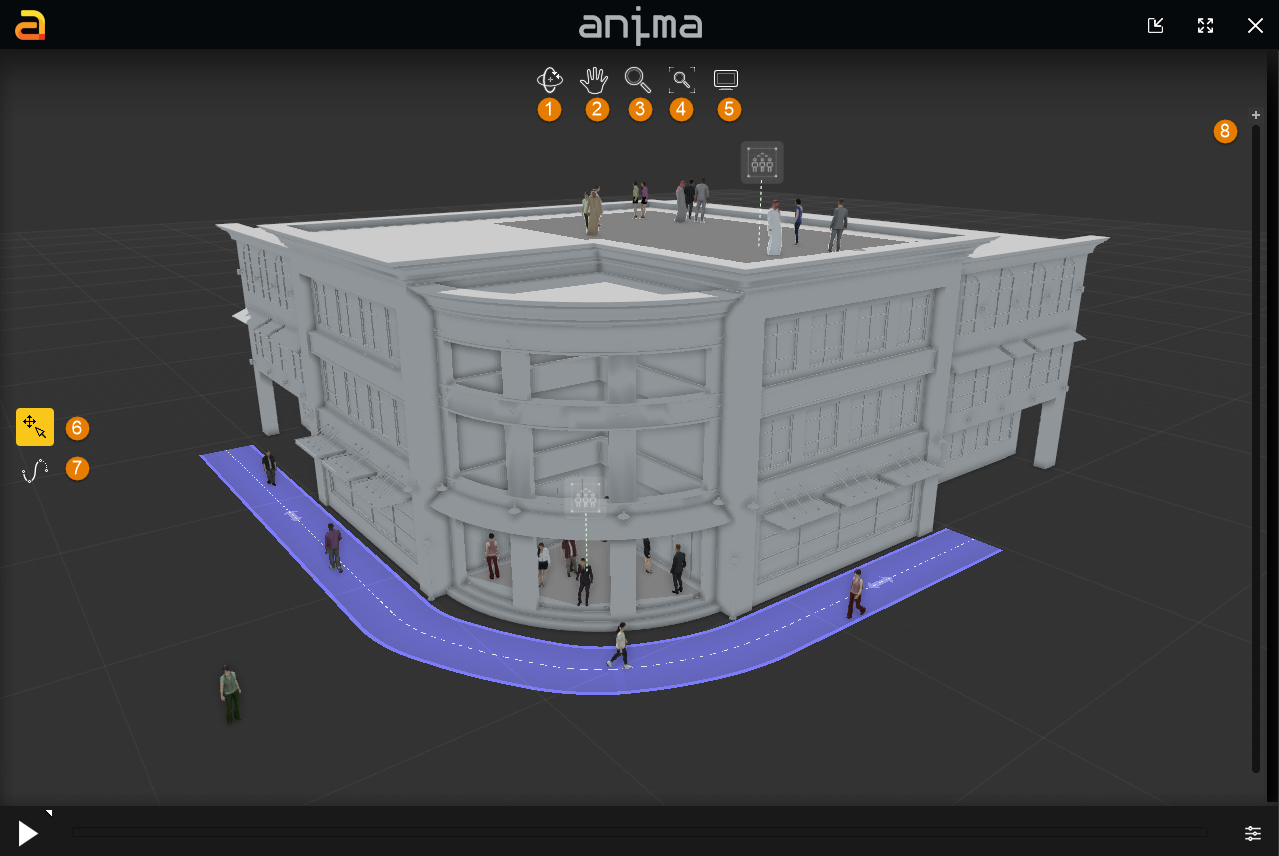
- Orbit Tool (Ctrl + LMB)
Use the Orbit tool to rotate the camera about the selected object.
- Pan Tool (Ctrl + RMB)
Use the Pan tool to move the camera vertically and horizontally.
- Zoom Tool (Mouse Wheel)
Use the zoom tool to change the magnification of the current view. - Zoom Extents
Use the Zoom Extents tool to adjust the magnification and center the camera so that it encompass all scene objects. - Display Preferences
Opens the preferences to control display properties of the 3D viewports. See the section below for more detailed information for each parameter..
- Select and Transform
Used to select objects such as splines, stairs, escalators and fixed paths, modify their geometry and reposition them in the scene. You can also define offsets for each individual Actor and move them between different animation areas.
- Walkway Tool
Use the Walkway Tool to draw animation paths that drive Actors. If you draw over a background model the walkway tool allows you to create animated characters on surfaces such as floors, terrain, ramps, and stairs.
- Background Model Clipping
Use the Clipping tool to slice the top from the background model. The bar on the right hand side of the viewport represents altitude, the lower you drag the bar the more of your model is removed. This tool is designed to allow you to quickly place Actors in multi-level scenes.
The 3D Viewport in Editing Mode
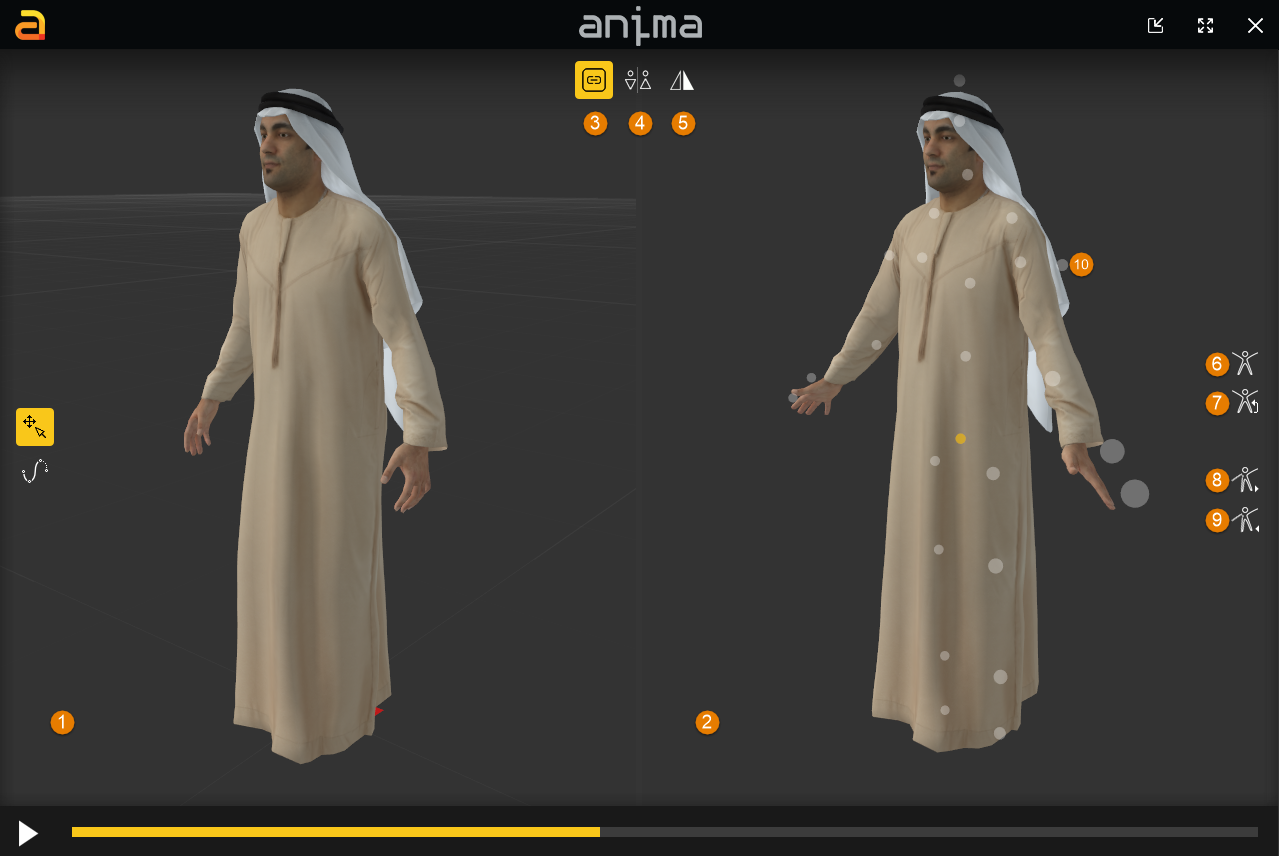
- Preview Window
Shows the selected Actor animated using the chosen Motion Clip. Any pose adjustments or color variations that you create are also previewed in this view. To orbit the viewports in Edit mode, just click anywhere except a bone node with the left mouse button and drag. - Pose Editor Window
The Pose Editor is used to fine tune motion clips by adjusting the poses of characters. For example, imagine you have a scene where you need your Actor to to look upward at something high, you can easily change the rotation of the skull to achieve this effect.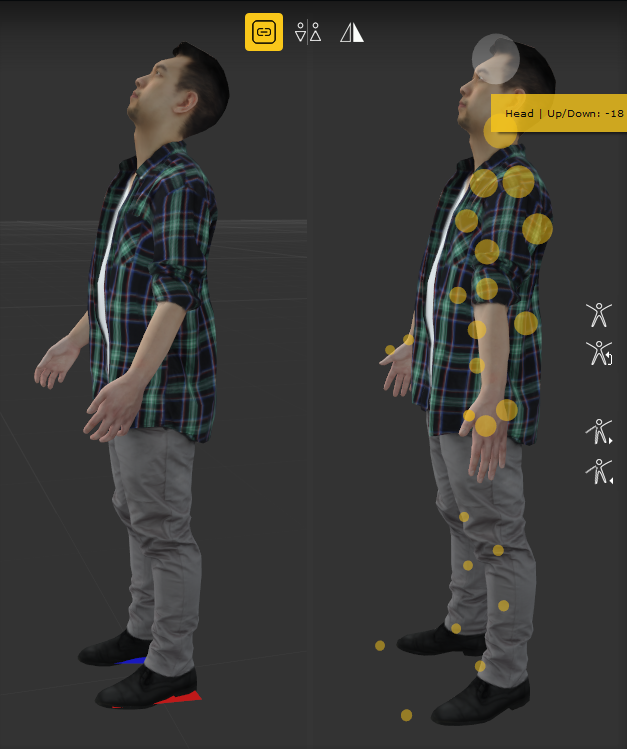
The pose editor window shows a yellow circle for each editable bone. Just click and drag to adjust the rotation. The axis the bone rotates around is determined by the orientation of the viewport. Typically sideways rotations are accessible from a front or back view, and front/back rotations are accessed from the side views. - Synchronize Viewports
Activate this toggle to keep the Preview and Pose editor windows in sync. In this mode orbiting one window changes them both. To change the view in each window independently, disable this option. - Generic Male/Female
Changes the display of the Generic Actor between male and female model. This Actor type is used to make global pose edits that will affect affect all characters for the chosen motion clip. Read more about this in CHAPTER 7: Advanced Editing and Importing Assets. - Symmetrical Pose Editing
Activate this toggle to turn on symmetrical pose editing. In this mode changes made to one side of the body are automatically mirrored to the other side. - Reset
Click to reset the pose for the current Actor and motion clip combination. - Undo Changes
Undo changes since the last time the pose was saved. - Copy Pose
Copy the current pose to the clipboard. This is useful for quickly duplicating poses onto multiple characters or motion clips. - Paste Pose
Paste the copied pose to the current character and motion clip combination.
The 2D Transform Gizmo
The 2D Transform Gizmo is used to move and rotate objects that are only able to be moved horizontally. This does not affect there ability to move vertically to snap to the surface of background objects.
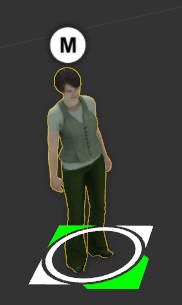
- Move Arrows
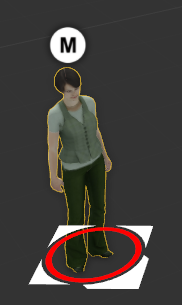
The move arrows, shown here in green, allow you to translate an object horizontally. The arrows represent object space so if you rotate the character, they’ll rotate as well. To move the object on both axes simultaneously, click and drag inside the rotate circle. - Rotate
The rotate circle, shown here in red, allows you to rotate an object around its vertical axis.
The 3D Transform Gizmo
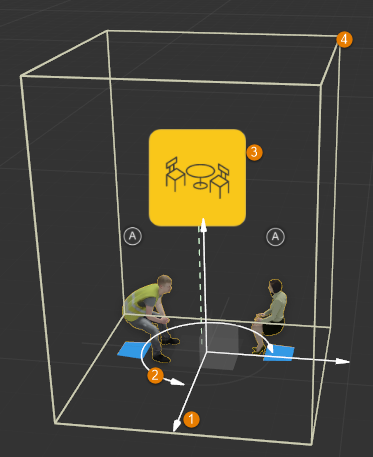
- Transform Arrows
The move arrows allow you to translate an object horizontally and vertically. Use individual arrows to constrain the axis or click on the squares between arrows to move objects on 2 axes simultaneously. - Rotate
Click and drag on the circle to rotate an object around its vertical axis. - Node Marker
The selectable node marker allows you to pick certain objects from the viewport. Click this to access the object’s properties. - Bounding Box
Shows the size of the selected object.
Display Preferences
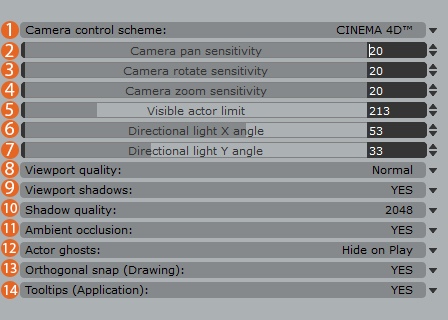
- Camera control Scheme
Choose between Anima, 3DS Max or C4D navigation mode and shortcut keys - Camera Pan Sensitivity
Controls the sensitivity of the Camera Pan tool, decrease this value if you feel the camera pans too quickly or increase it to speed it up. - Camera Rotate Sensitivity
Controls the sensitivity of the Camera Orbit tool, decrease this value if you feel the camera rotates too quickly or increase it to speed it up. - Camera Zoom Sensitivity
Controls the sensitivity of the Camera Zoom tool, decrease this value if you feel the camera Zooms too quickly or increase it to speed it up. - Visible Actor Limit
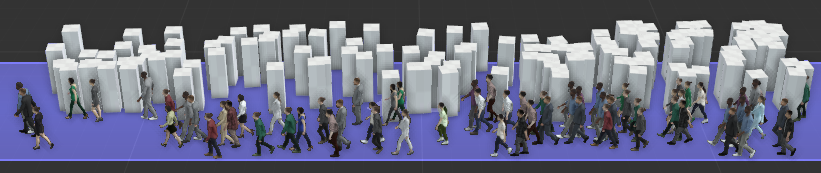
This values determines the number of Actors in the scene that are displayed in full mesh mode. If the number of Actors in the scene exceeds this value then they will display as simplified boxes to help keep the viewports fast and responsive.
- Directional Light X Angle
Controls the angle of the main directional light source on the X axis. - Directional Light Y Angle
Controls the angle of the light source on the Y axis. - Viewport Quality
It controls the quality of the texture maps display in the viewport. - Viewport Shadows
Enables or disables viewport shadows. - Shadow Quality
Controls the quality of viewport shadows. Higher resolutions generate better and more accurate results but at the expense of resources. - Ambient Occlusion
Enables or disables ambient occulsion. Recommended to be left On when using background models. - Actor Ghosts
Show or hide Actor ghosts. These are characters that have been removed from the simulation due to unresolvable collisions. - Orthogonal Snap (Drawing)
When drawing walkways this will allow you to snap to angles in increments of 45 degrees. - Tooltips (Application)
Turn on or off the application level Tooltips. If you’re new to Anima we’d recommend leaving these on but once mastered you may prefer them to be disabled.