Overview
Anima allows you to render animations in your favorite 3d application using plugins specially designed to import and render a large quantity of 3D characters. The Anima plugin for 3ds Max optimizes memory usage and gives you the flexibility to use your choice of renderer including V-Ray, Corona, Scanline and Mental Ray.
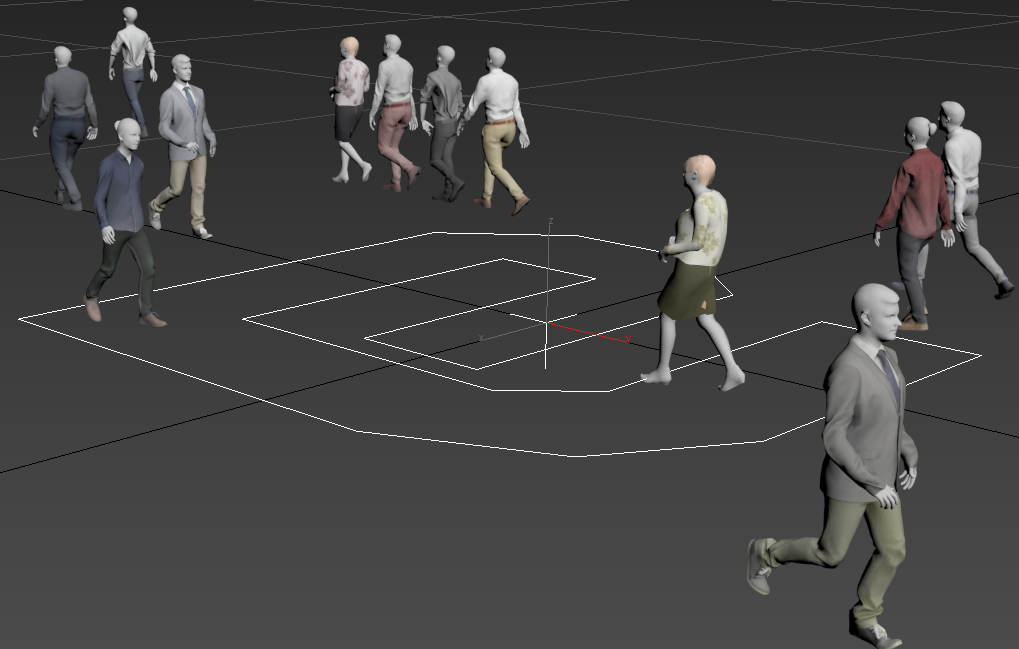
For each scene you import the 3ds Max plugin will create two types of object, Anima Actors for each person in your simulation, and a single Anima Scene object that is used to control them. To edit the parameters for Anima Actors and Scene objects, simply select them and open the Modify Panel.
Installation
To automatically install the Anima plugin for 3ds Max
In normal usage plugins are installed or all your 3ds Max versions automatically using the Anima installer.
To manually install the Anima plugin for 3ds Max
If you need to install the plugins manually, follow these steps:
- Go to your Anima installation directory and locate the Plugins3dsmax folder. The default location is in C:Program FilesaXYZ designAnima 2Plugins3dsmax.
- In this location is a folder for each version of Max. Open the version you need and copy Anima2.MAX.dli.
- Locate the folder where 3ds Max is installed on your computer. The default for it is in C:Program FilesAutodesk3ds Max 20xx.
- Open the plugins directory and paste in file Anima2.MAX.dli
- Finally copy the contents of aXYZ designanima 23dsmaxScripts to the Autodesk3ds Max 20xxScripts directory.
Procedures
To open a scene
Loading, controlling and rendering an Anima scene into 3ds Max is really simple, just follow these steps:
- Go to File Menu and click on Import.
- Under File Type select Anima Project (*.aniproj) and then browse to the location of your Anima project. Select it and Click Open.

- The Select Scene menu opens with a dropdown list showing all the available Anima scenes in the project. Choose the one you wish to load and click Open.
You can also click on the circles to select multiple scenes to merge them in one 3DS Max scene.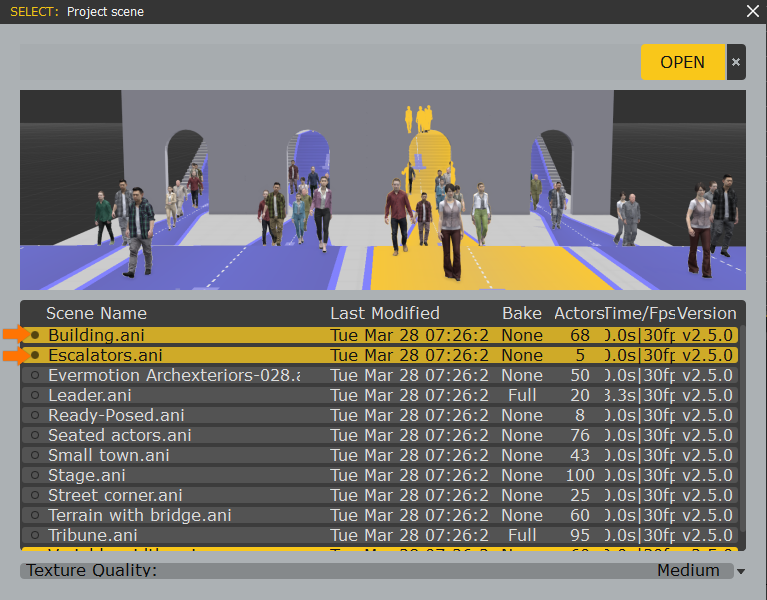
- Select the Texture Quality of your actors:
“Very Low” : diffuse 512, Normal 512, Specular 512, Other maps 512
“Low” : Diffuse 1024, Normal 1024, Specular 1024, Other maps 1024
“Medium” : Diffuse 1024, Normal 2048, Specular 1024, Other maps 1024
“High” : Diffuse 2048, Normal 2048, Specular 2048, Other maps 2048
“Very High” : Diffuse 2048, Normal 4096, Specular 2048, Other maps 2048
“Insane” : Diffuse 4096, Normal 4096, Specular 4096, Other maps 4096

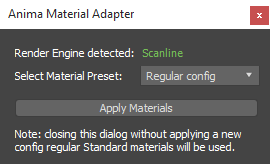
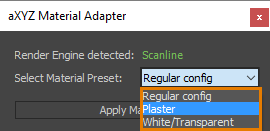
- The Material Adapter window opens. This automatically detects and creates photorealistic materials for your current renderer but also allows you to select from alternative options like Plaster or Semi Opaque materials for stylized results. To load photoreal materials leave the settings on Regular Config and click Apply Materials to import the Anima scene.
To delete actors
To delete individual actors:
- Select an Actor and press the Delete key.
To delete all actors:
- Select the Anima Scene object for the actors and press the Delete key.
To use stylized materials
The Anima plugin allow you to choose from a number of built in non-photorealistic materials for your characters. To use this feature when you import a character, just make sure that you select them from the drop down list when the Material Adapter menu opens. Please see the previous procedure for more detailed information about this technique. If however you wish to change a previously loaded scene to use stylized materials, follow these steps.
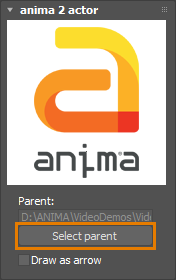
- Select the Anima Scene object for the characters you’d like to change. For a quick way to locate the scene object just select a character, go to the Modify Panel and click Select Parent.
- With the Scene Object selected click Rebuild Materials to open the Material Adapter.
- Pick a new material type from the drop down list.
- Click Apply Materials to apply the preset.
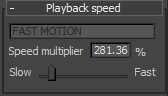
To change animation speed
The Anima plugin for 3ds Max allows you to change the playback speed of animations. This is ideal for creating slow motion and high speed effects, or simply to subtly adjust the scene. To use this feature:
- Select the Anima Scene object for the characters you wish to edit.
- Open the Modify Panel.
- Adjust the Playback Speed value or slider. Values less than 100% slow down the animation and values greater than 100% speed it up.
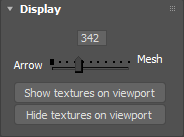
To optimize viewport previews
Displaying hundreds or thousands of animated characters can be taxing for your viewports. To make sure you never see a slow-down the Anima plugin allows you to display characters as arrows when their number exceeds a set threshold. To do use this feature:
- Select an Anima Scene object.
- Open the Modify Panel.
- Adjust the Display Value. This represents the number of characters to display in full mesh mode.
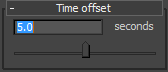
To Offset Animation
You can fine-tune animation by offsetting it along the timeline. To use this feature:
- Select an Anima Scene object.
- Open the Modify Panel.
- Adjust the Time Offset parameter. Negative values move the animation backwards in time, positive values move it forwards.
Interface
Anima Scene Controller
When you open an Anima project in 3ds Max you import an Anima Scene Controller as well as all the individual characters. The scene controller is represented in the viewports by a symbol in the form of the anima logo.
To control many aspects of the display and playback of the characters, select the scene controller and open the Modify panel to access the following settings:
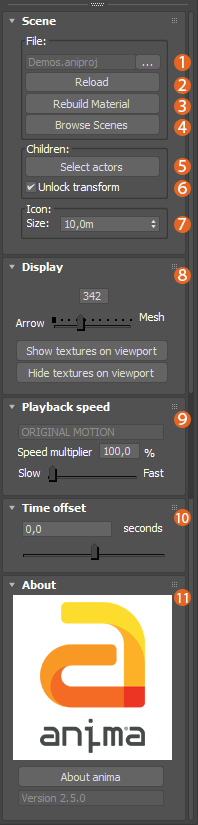
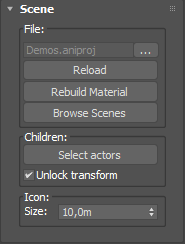
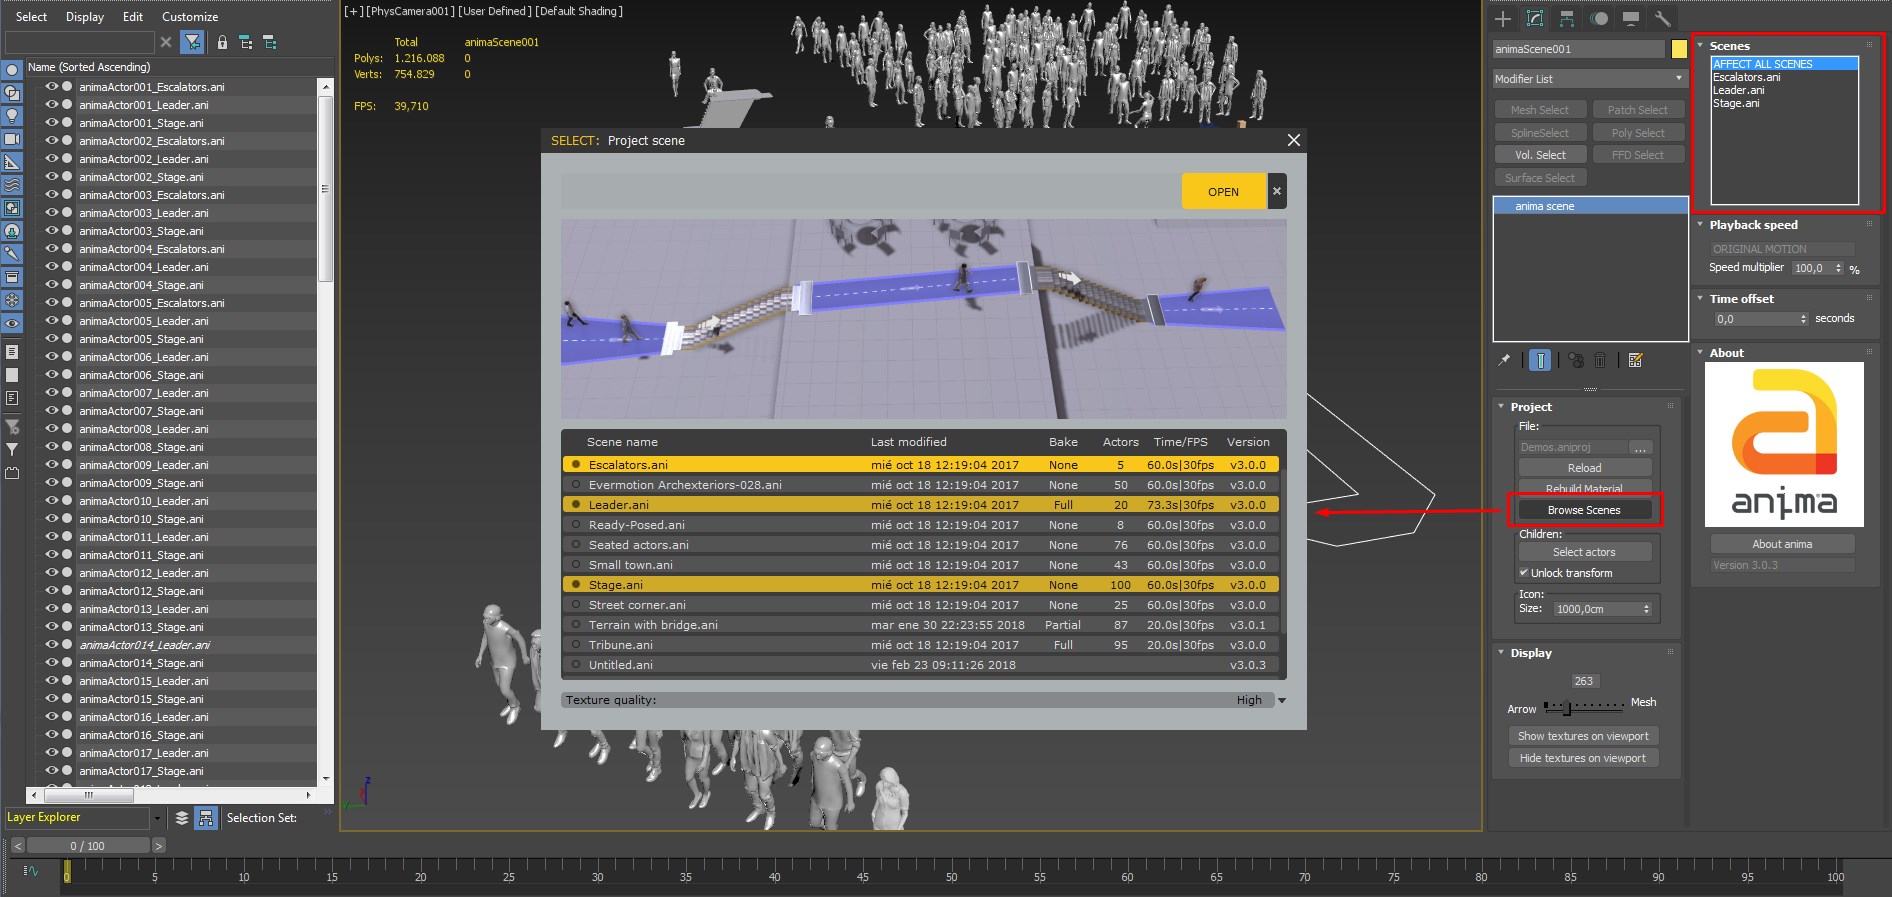
- 1. Anima Project
The anima project associated with the scene controller. Click on the ellipsis (…) to change the project. - 2. Reload
Reloads the Anima project and opens the Select Scene window. You can use this to either open a different scene, replacing the existing characters, or update the scene after making changes to it in Anima standalone. - 3. Rebuild Material
Opens the Material Adapter window allowing you to regenerate the materials. You can use this to rebuild the materials with appropriate shaders if you change to a different renderer, or if you’d like to swap the photoreal materials for one of the alternative options. - 4.Browse Scenes
Allows you to select other scenes to merge them with the current scene in 3DSMax, but remember that the collisions won´t be recalculate. - 5.Select Actors
Click to select all the characters associated with this scene. - 6. Unlock Transform
Lets you translate, rotate and scale the whole Anima scene, (it doesn´t work for individual actors). - 7. Icon
Controls the size of the Anima icon in the viewport, measured in scene units. - 8. Display
Controls the number of characters that can be displayed in Full Mesh mode. If there are more characters in the scene than this value then the additional characters display as a simplified arrow. This is to keep viewport playback responsive but it doesn’t affect the render. You can also display or hide the textures in the viewports. - 9. Playback Speed
Controls the animation speed.Use value less than 100% to play back animations in slow motion or greater than 100% to speed them up. - 10. Time Offset
Offsets start and end point of the animation. Measured in seconds. - 11. About
Displays information about your version of the Anima plugin for 3ds Max. You may be asked for this if you contact support.
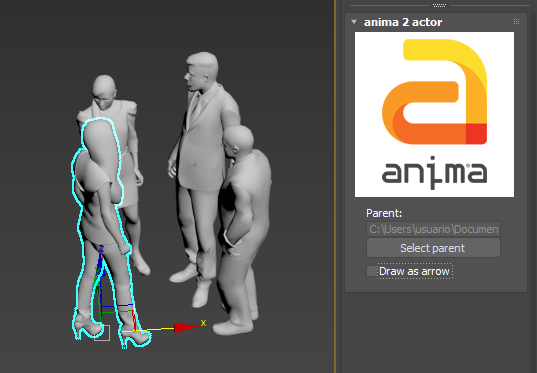
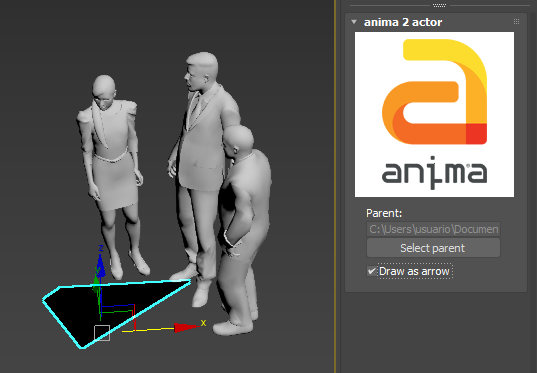
Anima Scene Object
To manually change the display mode of an individual character, select them and open the Modify panel.
1. Parent
Displays the Anima Project file to which this character is associated.
2. Draw as arrow
Turn this option on to display the character in the viewports as an arrow mesh. Does not affect rendering.
Workflow with Xrefs
We highly recommend you to not use anima® scenes inside 3dsMax Xrefs files.
The anima® plugin for 3dsMax uses extreme optimizations that let it handle a huge number of actors and animations. These optimizations can be done thanks to the anima® animation engine that uses our plugin inside 3dsMax. This system has great number of pros and only one limitation: it only can be one object of this type inside the entire 3dsMax scene loaded in memory (and that includes the Xref files).
That’s one of the reasons why we designed anima® as a project-based software. Each project can have multiple scenes and within the same project you can share resources that can be used for any of the project’s scenes (backgrounds, custom actors, custom animations, etc).
When you load an anima® project from 3dsMax, our plugin connects your 3dsMax scene with one or multiple anima® scenes of the project. Initially is just one, but you can later load more scenes of the same project using the Anima Scene Controller:
This way you can load an arbitrary number of anima® scenes inside the same 3dsMax file, they only need to be part of the same anima® project. That let’s you use a similar workflow that is often used in 3dsMax with Xref files, where you slice the project in several parts (Xref files in 3dsMax, scenes in anima®) that are referenced from another centralized base file (the main file in 3dsMax, the project in anima®).
So, the suggested workflow in large projects with multiple Xrefs is to build one anima® project and with one scene for each Xref. While you are working on each Xref you can import and the anima® scene in there to quickly go back and forth and check the results of your work inside the anima® app. Then, when you finish, remove the anima® Anima Scene Controller from that Xref and instead load the anima® scene directly from Anima Scene Controller on the main 3dsMax file.
Just keep in mind that it can only be one anima® project loaded and that it must be imported in the main 3dsMax file (it cannot be in a 3dsMax referenced file).