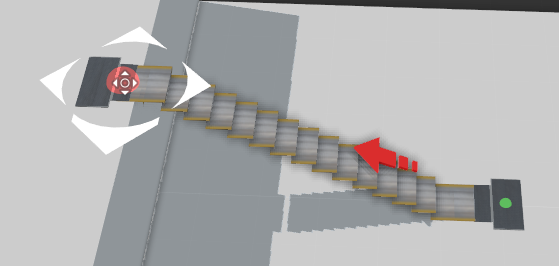
Anima allows you to create fully animated escalators and moving walkways. Link an escalator to a walkway and Characters will realistically step on and off of them as a part of the their journey. By creating a chain of walkways, slopes, stair, travelators and escalators you can design complex paths for you characters to explore every part of a scene.
To see examples of some of the features discussed in this section you will find the following sample scenes accessible from the Welcome Screen.
- Escalator.ani
This scene demonstrate hows escalators and walkways can be combined to create a continuous pathway for actors.
Procedures
To create an Escalator
- Click and drag the Escalator object found in the Library Presets panel into the 3d viewport and release the mouse.

- Move the mouse to change the location of the object and click to drop the escalator into the scene.
- Go to the Properties Panel and set the angle of the escalator using the Fixed Inclination property or the Inclination presets. Use the Width parameter to set the size.
- Drag the point at the top of the Escalator onto the top floor to set the height.
- Use the Selection tool and the Transform Gizmo to move and rotate the escalator into the correct position.
- Create a new Walkway and move a path point over the top or bottom of the escalator. The cursor will change to the Link icon to indicate that the two objects will be connected.
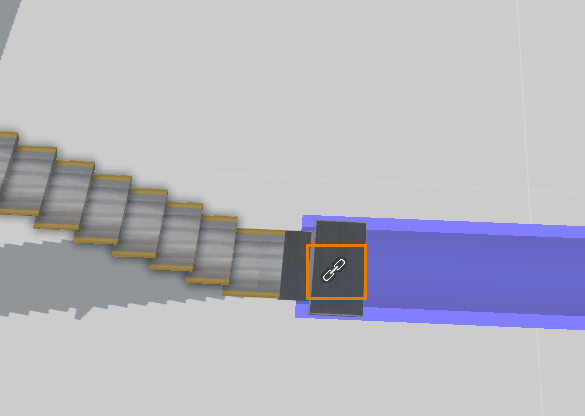
- Release the mouse and the walkway will extend to the full length of the escalator and enable you to continue drawing from the other end.
NOTE. You can also move the path points of an existing walkway to link to a new escalator. Even points in the middle of a walkway will work.
To create a moving walkway.
To create a moving walkway instead of an escalator follow the same procedure as if you are creating an escalator but set the Inclination parameter to a value that’s less than 14 degrees. This will automatically switch the escalator into moving walkway mode.
To change the direction of an Escalator
Either:
- Click the Arrow on the escalator model.

Or:
- Click the Change Direction button in the top left hand corner of the Properties Panel
Interface
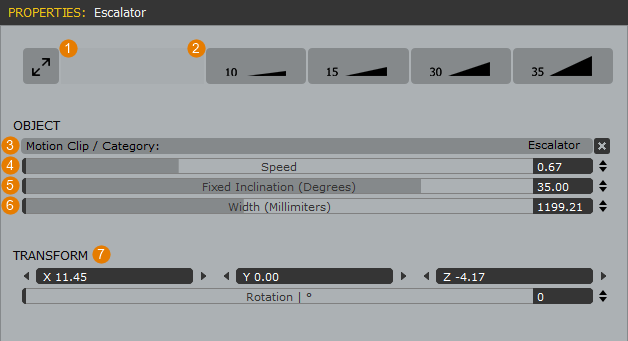
- Change Direction
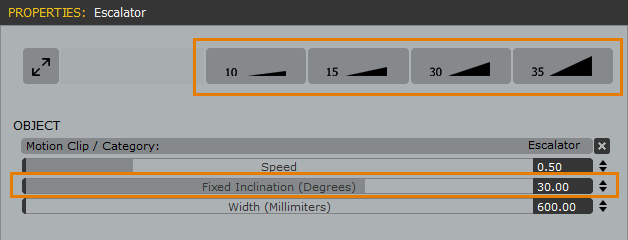
Click this button to change the direction of the escalator. You can also click the arrow on the escalator model to swap the direction. - Incline Presets
Allow you to quickly select from many standard inclines for escalators.Just click one of these buttons to set the escalators to the angle shown in the preview. - Motion Clip / Category
Used to assign a Motion Clip or Motion Category to the area.
- Speed
Change the speed of the escalator. Smaller values are faster, larger values are slower. - Incline
Used this parameter to manually enter the angle of the escalator or walkway. Anything below 14 degrees turns the object into a moving walkway, angles of 14 degrees or greater will create an escalator. - Width
This value controls the step width of the escalator. By default it is set at 600 mm. - Transform
Use the Transform parameters to change the Translation and Rotation of the escalator object. Alternatively you can use the selection tool in the 3d viewport.