Before you start your animation project, you’ll need to prepare your 3D architectural models for use in Anima. These imported 3D models will only be used as a reference for the design of the animation paths and areas, they won’t be visible during the rendering phase.
If your background model is very high poly you may only want to bring the geometry essential for planning your animation into Anima. If this is the case, when you prepare your model for import the most important question to ask yourself is what do I need? Each job will vary, but to help you decide what you need in Anima, it’s helpful to think about the elements of your scene as fitting into two categories:
- Walking Surfaces
These are all the surfaces on which characters will walk, climb, stand, or run such as floors, stairs and ramps. These surfaces are crucial to aid you in the design and placement of Walkways and Areas. - Blocking Surfaces
These are all the surfaces that could block your characters path. They could be walls, facades, props or any other obstacles in your scene. Importing these will help you to design Walkways, place Areas and create Avoiding areas so that characters interact with the architecture of your scene convincingly.
Anything that doesn’t fit into these categories doesn’t need to be imported.
NOTE Each scene can contain one background model.
Procedures
To Import a Background Model
To import a background model you can either click Main Menu ![]() > Scene > Import Background Model, or right-click in the viewport or Project Panel and select Import Background Model. However you choose to do it, the remainder of the procedure remains the same:
> Scene > Import Background Model, or right-click in the viewport or Project Panel and select Import Background Model. However you choose to do it, the remainder of the procedure remains the same:
- Use the Open 3D Model file picker and select a background model. Anima supports a wide range of file formats including the following:
.3ds
The .3ds file format has grown to become an industry standard for transferring models between 3D modeling packages.
.obj
The Wavefront .obj file format is a standard 3D object file format that offer full compatibility with almost all 3D modeling packages.
.lwo
The LightWave Object file format is a proprietary binary file format and is the standard export format used with LightWave 3D and Modo.
.fbx
The FBX files format is a proprietary interchange format most commonly used to transfer objects between Autodesk products, but is also finding widespread use in other products.
- Select a model and click Open.
- The Import Model menu will open with the following options:
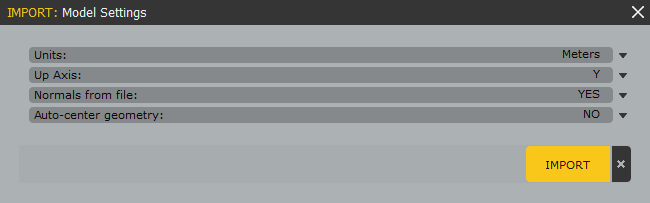 Units
Units
The unit of measurement of your reference 3D model.
Up Axis
The up axis used by the 3d application the model was created in. If your model is rotated incorrectly, you may need to change this property when you reimport.
Normals from file
Imports the normal directions from the file. If you turn this off then Anima will attempt to generate its own normals
Auto-center geometry
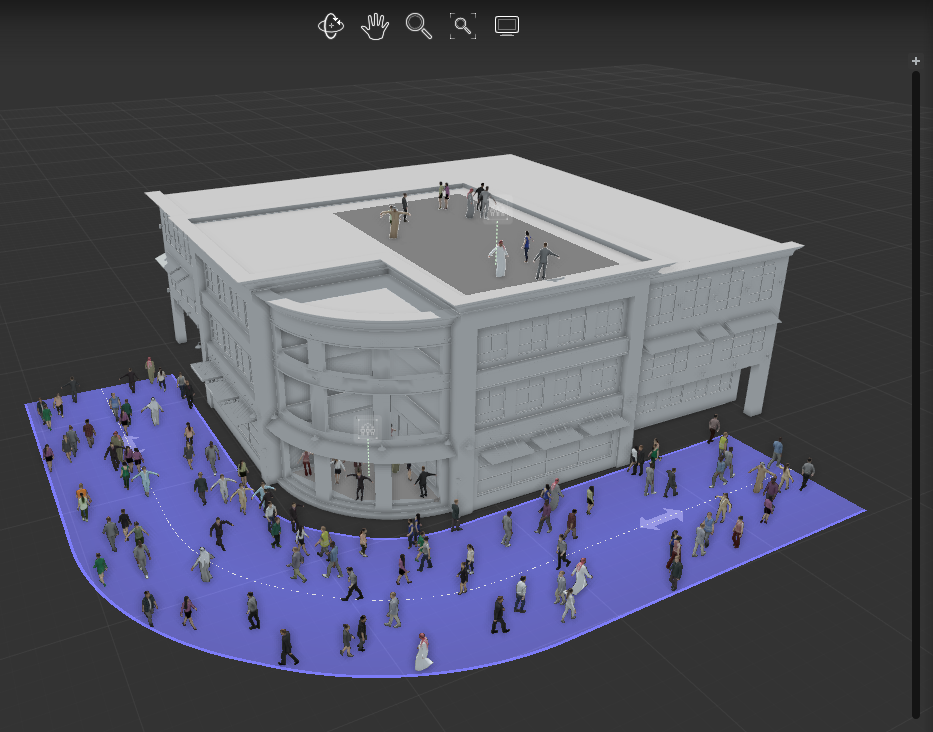
When this is Off, which is the default, the imported objects will retain the same world-space coordinates as in the source file. In normal use you want the location of imported models to match the source file precisely so that when the characters are exported for rendering, they are in the correct position in your scene. However it is possible, if you prefer, to auto-center the model in Anima’s world space. This can be useful if you’re importing models from cad applications where geometry is often created very far from the center of the scene.When you’ve selected the correct settings to match your model and 3d program, just click Import. - You will now have a background model in your scene that can be used to place your actors.
NOTE If anima detects that you have set your scene units up incorrectly you may get an import warning.
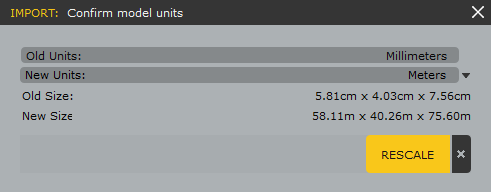
From here you can choose different units of measurement and click Rescale to continue. You can also see helpful statistics about the size of the model when you change the unit types to help you set them correctly.
Hiding and Deleting Background Models
To prevent you from accidentally moving them, background models can not be selected by clicking them in the viewports. Instead you have to select them in the ProjectPanel
From here you can hide the background model by clicking on the visibility toggle:

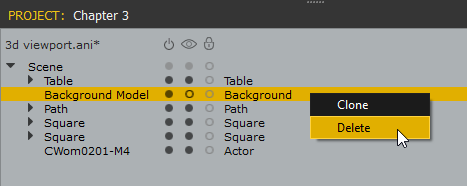
If you want to remove the background model from the scene completely, right-click it in the Project Panel and select Delete.
NOTE Once a background model is selected in the Project Panel it is also possible to move it using the transform gizmo in the 3d viewport. However you should do this with caution, if you create actors on a moved building you may have alignment issues when you import your Anima project back into your rendering program.
To clip the background model
Use the Clipping tool to slice the top from the background model. The bar on the right-hand side of the viewport represents altitude, the lower you drag the bar the more of your model is removed.
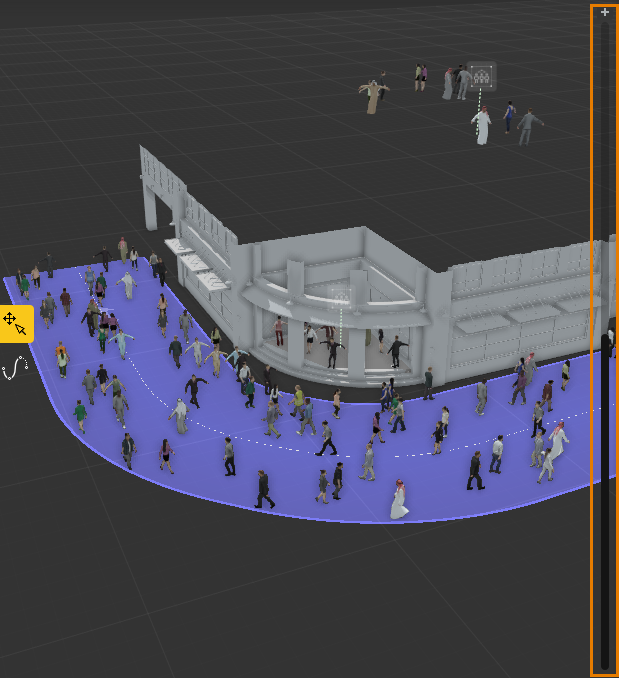
This tool is designed to allow you to quickly place actors in multi-level scenes giving you access to parts of a building that would otherwise be inaccessible.
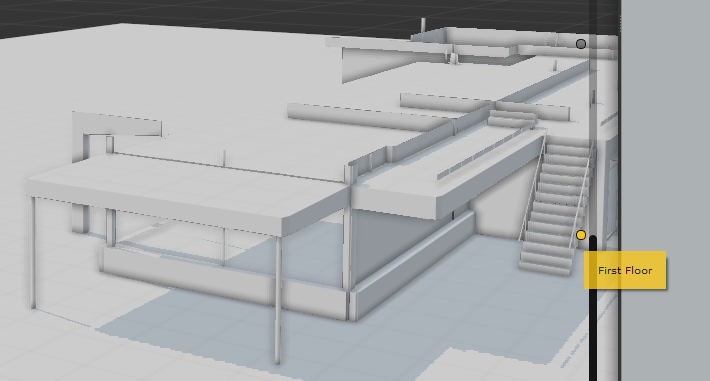
To quickly access preset heights, you can create markers on the clipping bar. This features is particularly useful for architectural visualization as it allows you to split your building according to its different floors. To add a marker for the current clipping height, do one of the following.
- Click on the + sign at the top of the Clipping Bar.
- Double-click on the Clipping Bar.
- Right-click on the Clipping Bar and select Add Point at Current Height.
Once a clipping marker has been created it can be renamed. Just right-click on the point and select Rename. Enter a new name for the clipping height and click OK

When you hover the mouse over this point the name will displayed. Click the point to set the clipping height at this level.
Finally, to remove a point right-click on it and select Delete.