How to import anima© scenes in UE4
With anima© 3 you can transfer to Unreal Engine 4 all the actors, materials and animations build in the anima© scenes with only a few mouse clicks.
However, in order to be able to do that kind of magic you will need to install the plugin that is distributed within anima© Installer.
Plugin Installation
The anima© plugin for UE4 will be installed automatically if a compatible version of UE4 is detected during the anima© Stand-Alone installing process:
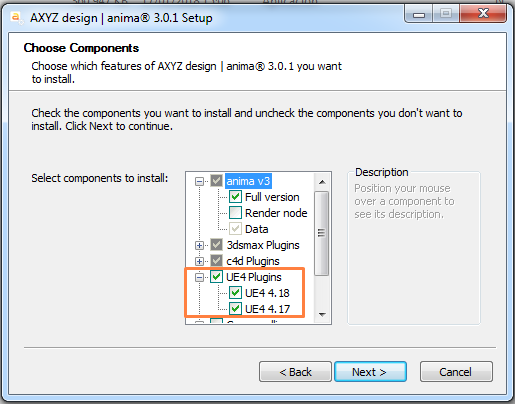
Please note that anima© supports all official Unreal Engine 4 versions since 4.17 to 4.20.
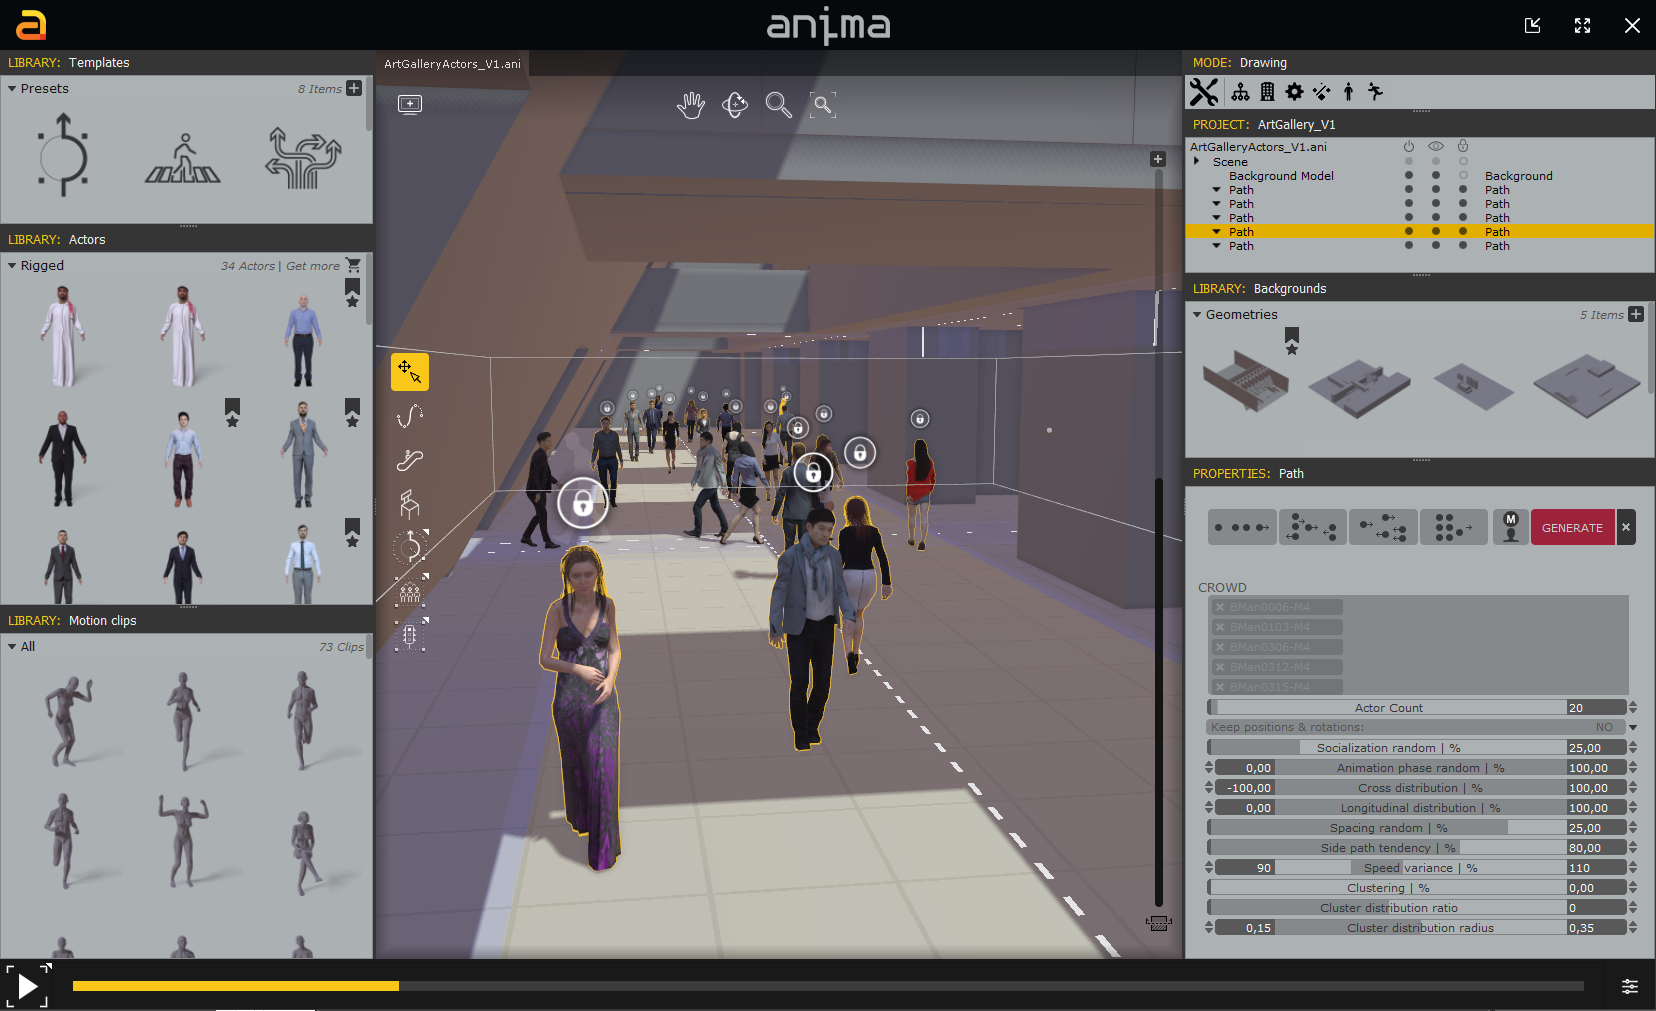
Build your scene in anima©
Once installed, you can simple start using anima© to create your projects and build all the scenes that you plan to send to Unreal.
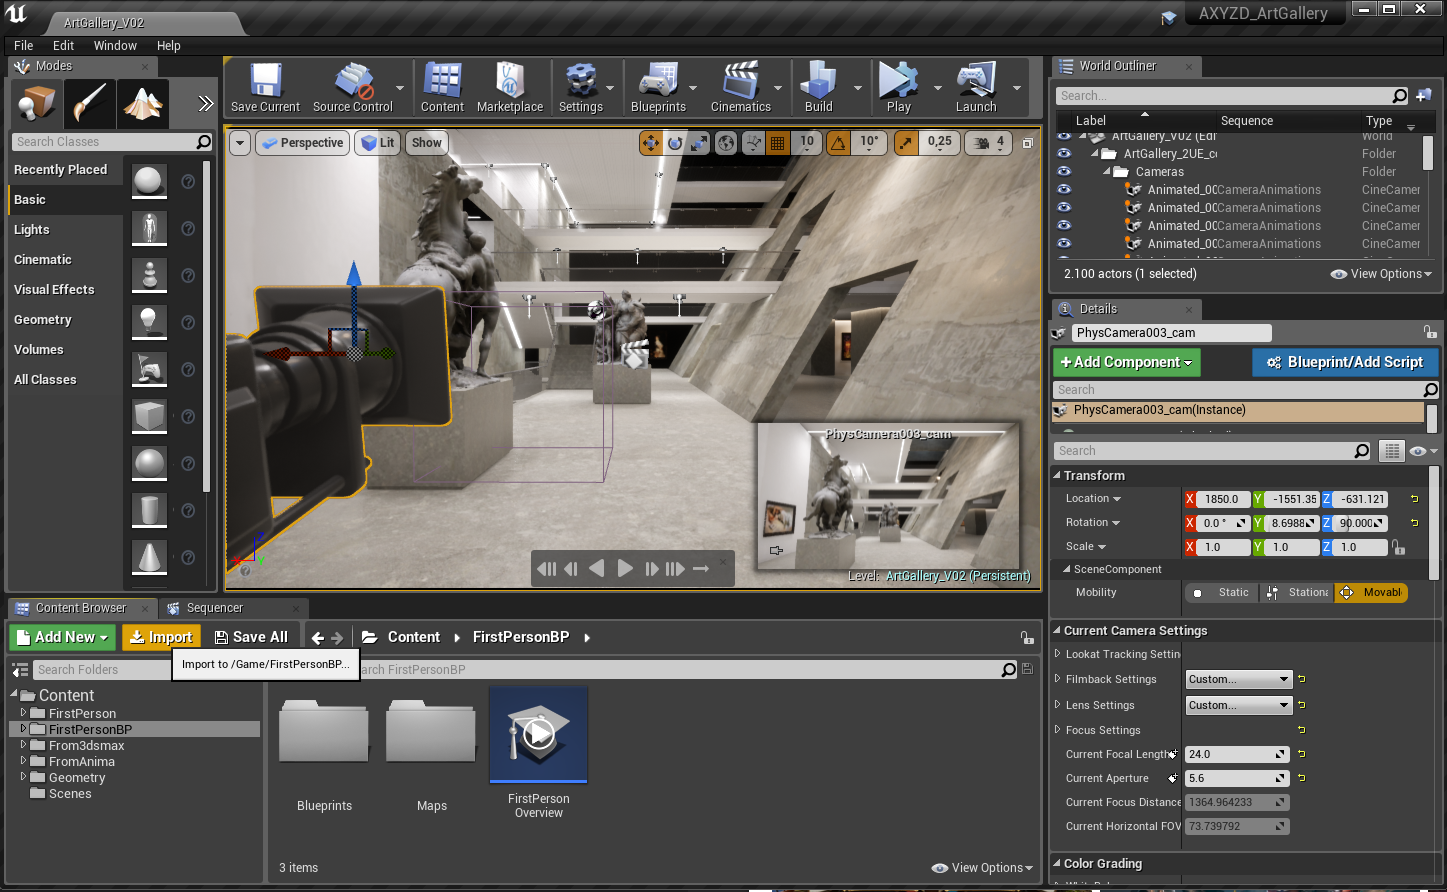
After that, you can save them as usual and launch your Unreal project where you will import your scenes in. All the hard work of packaging the scenes, actors, materials and animations will be done 100% automagically by our UE4 plugin.
Importing the scene from Unreal
1. Inside UE4, open your Unreal project and then click on the import button from the Content Browser:
2. Browse for your anima© Project and click on Open:

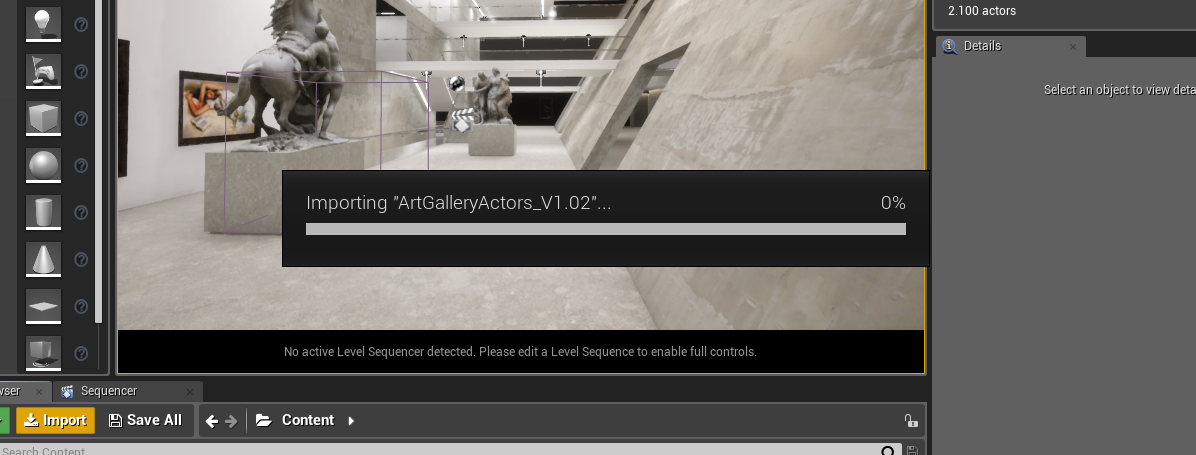
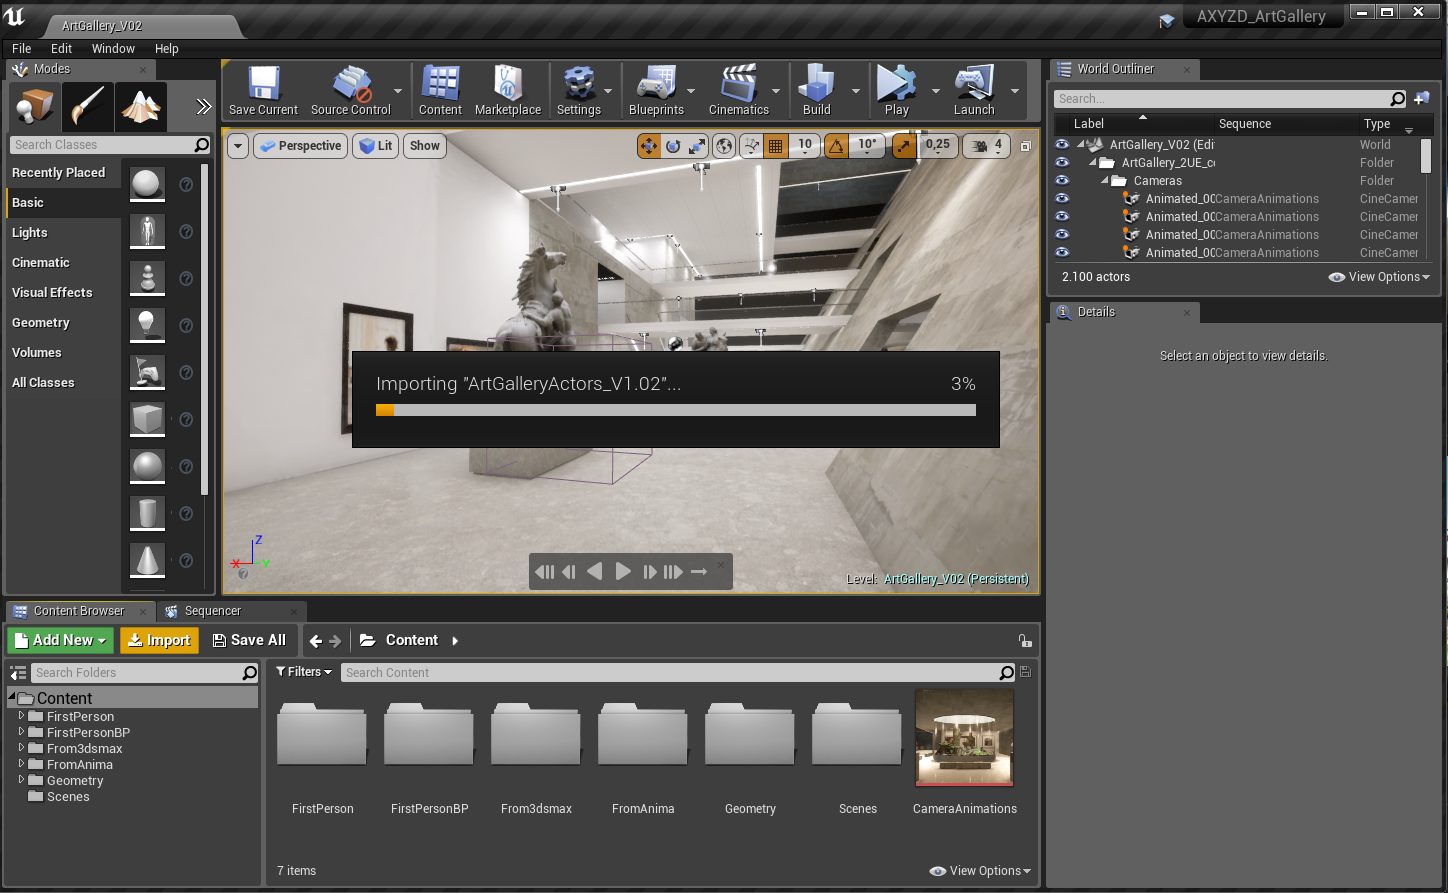
3. The file should be correctly detected by the plugin and the import process will begin:
4. After a few seconds the anima© Open Scene dialog will appear to let you choose which scene of the project do you want to import into UE4:
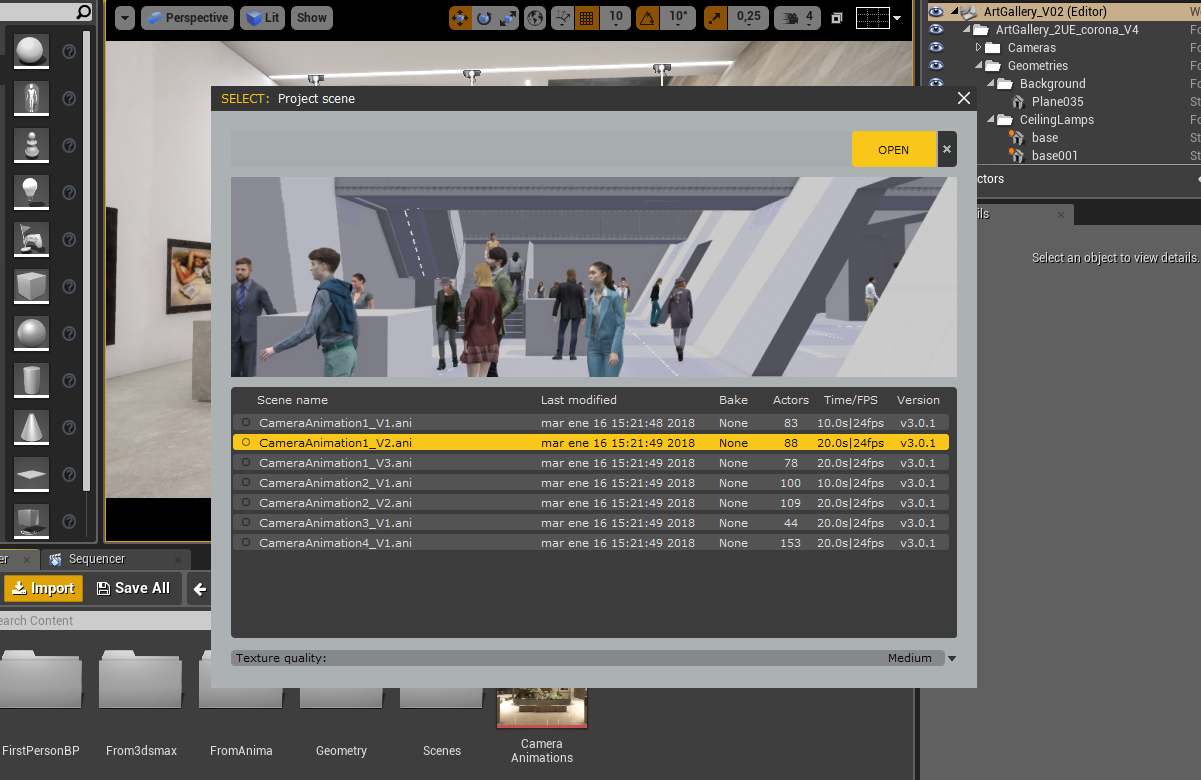
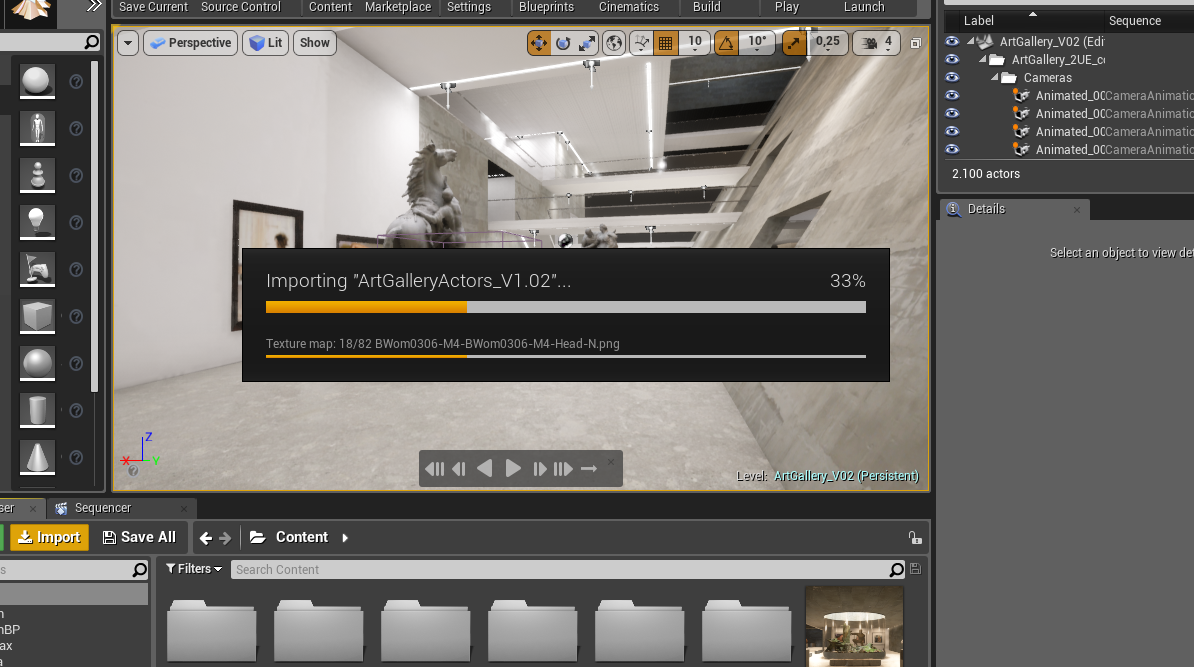
5. Select the scene that contains the animation that you want import and click Open. The import process will start showing a progress bar with the current status:
6. After a few seconds, a new window will appear to let you configure the actions that will be performed during the importing process:
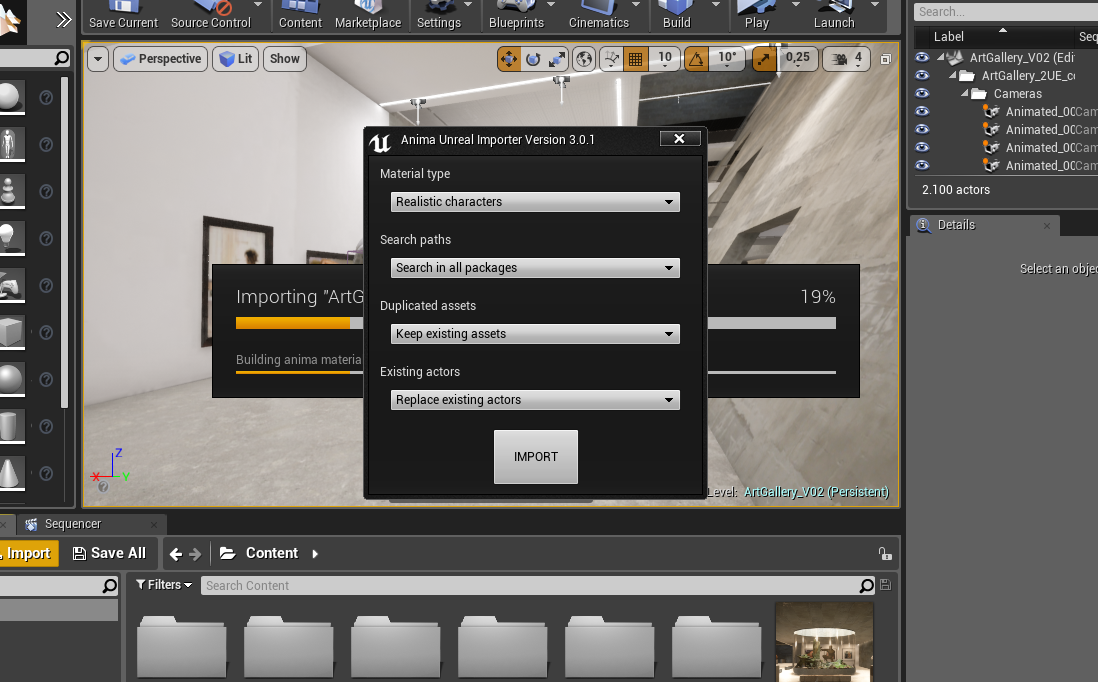
Import Options
You have four drop-down selectors to define: Material type, Search paths, Duplicated assets and Existing actors. Each of this selectors have a tool tip that explains what action will be performed for each option:
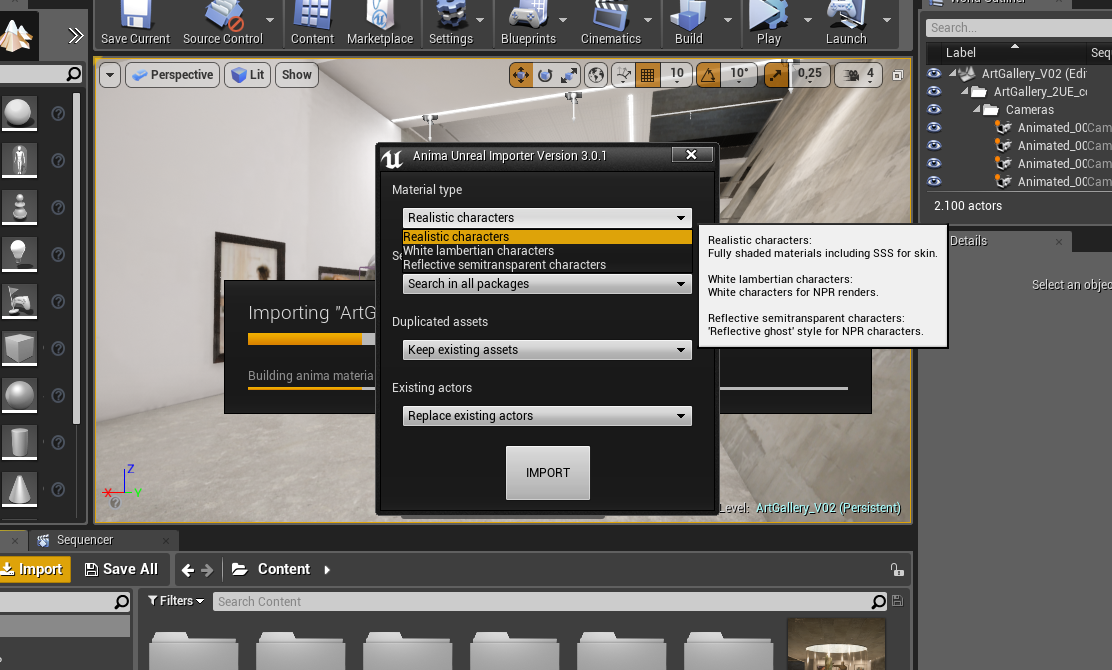
- Material Type.
- Realistic characters: Fully shaded materials including SSS for skin.
- White lambertian characters: White characters for Non Photo Realistic renders.
- Reflective semitransparent characters: Reflective ghost style for Non Photo Realistic characters.
- Search Paths:
- Search in all packages: Search collision items in all the Unreal Engine project folders (this will affect actors, materials, lights, etc.).
- Search in current package: Search collision items only in the current folder of the Unreal Engine project (this will affect actors, materials, lights, etc).
- Duplicated Assets:
- Keep existing assets: In case of overlapping assets, ignore the new asset and keep the old one.
- Replace existing assets: In case of overlapping assets, delete the old asset and import the new one.
- Existing Actors:
- Replace existing actors: In case of overlapping actors, delete the old actor and import the new one.
- Keep existing actors: In case of overlapping actors, ignore the new actor and keep the old one.
After the options are set, click on the Import button and the process will continue:
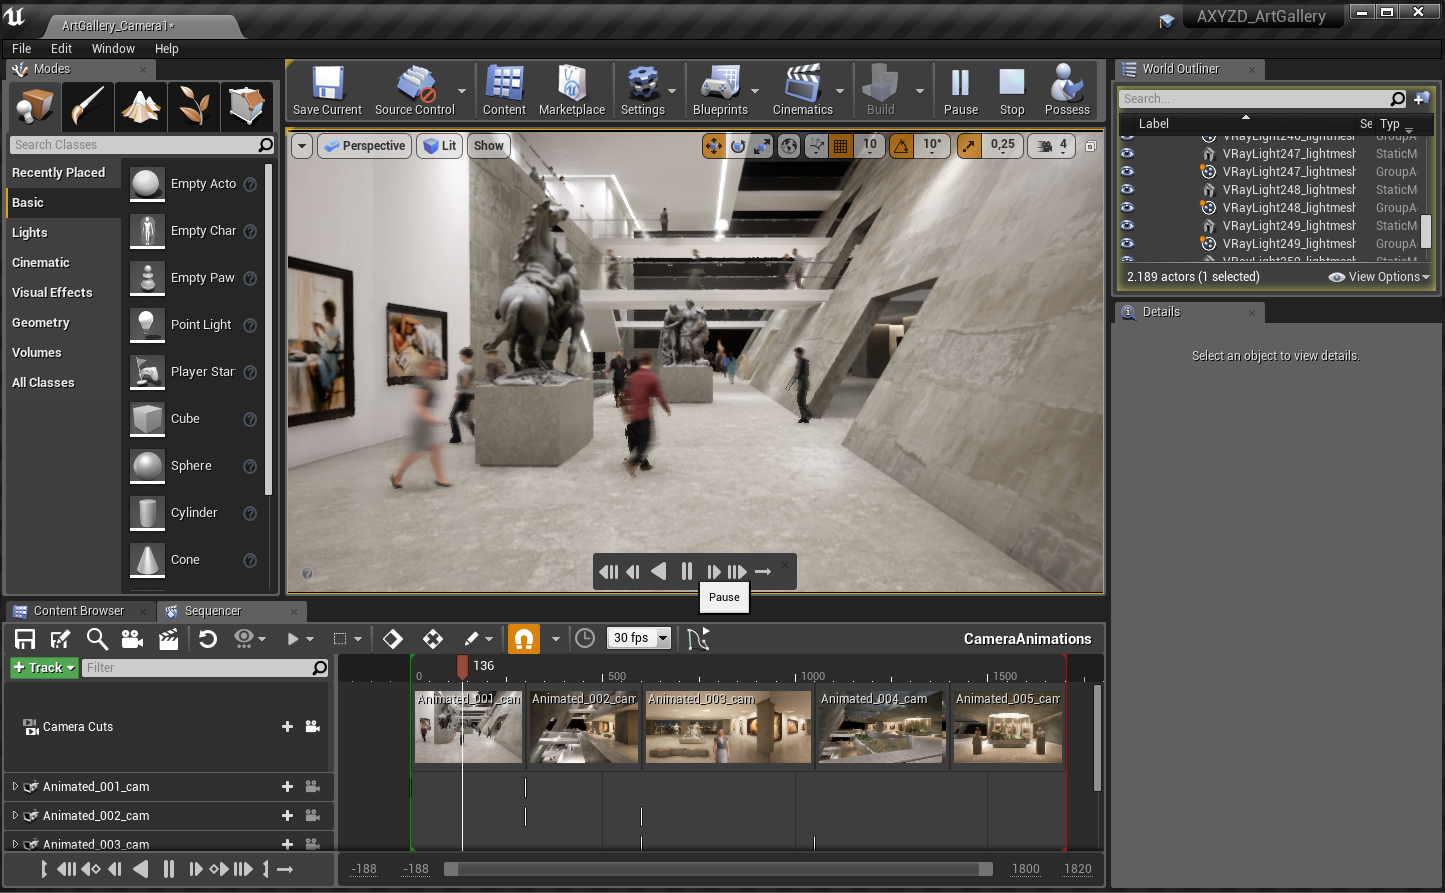
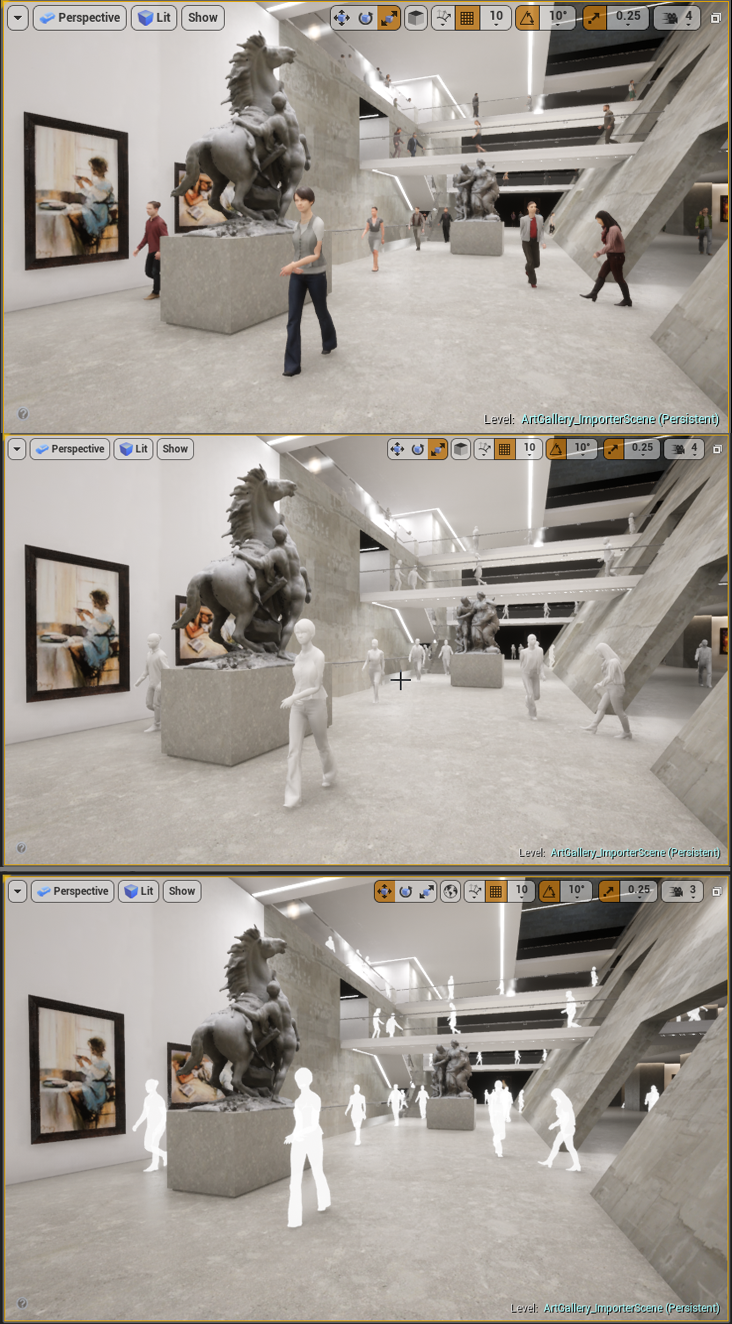
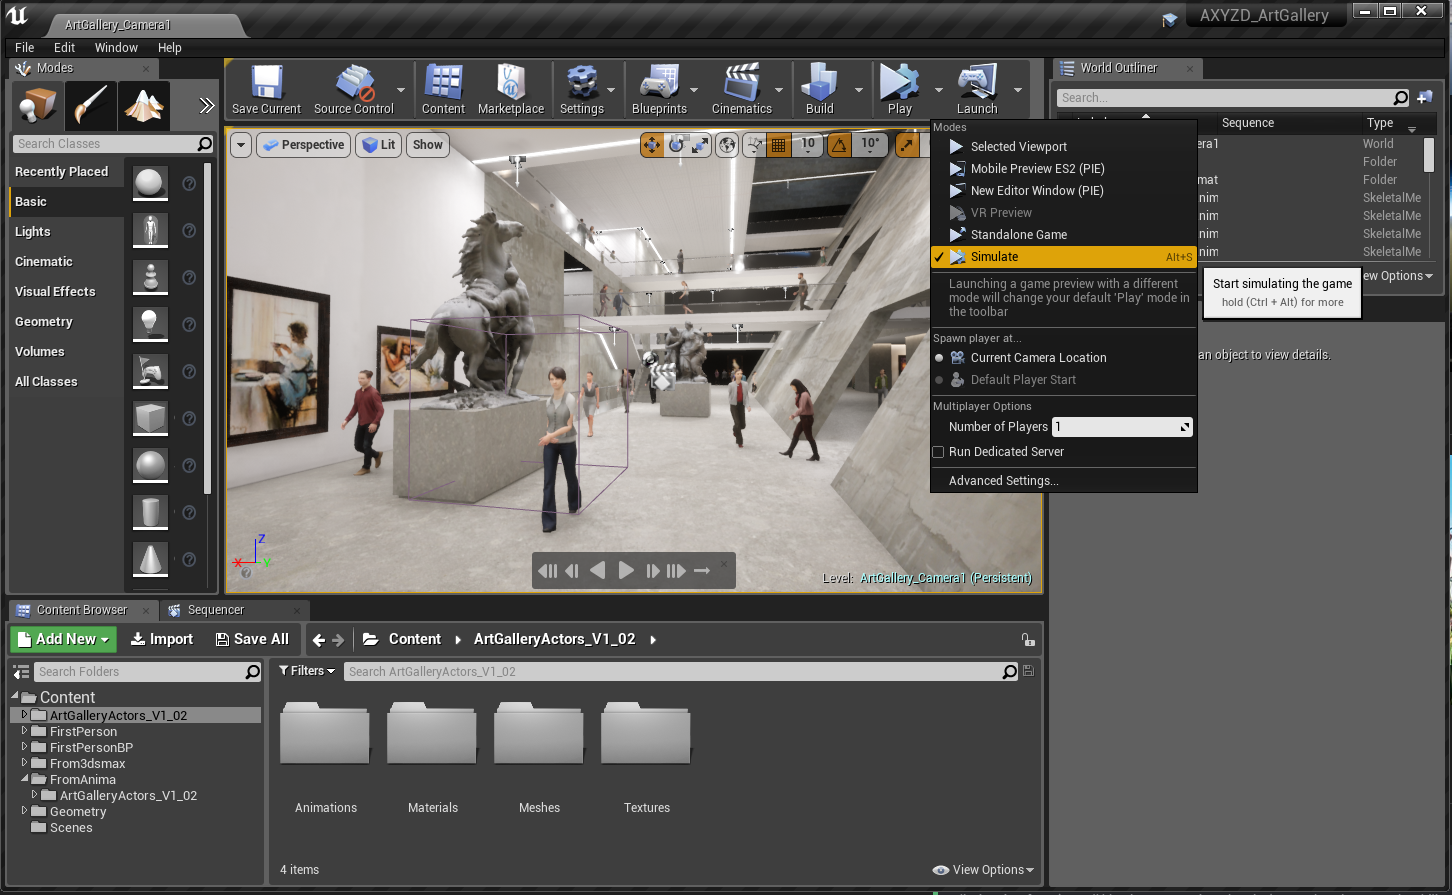
Finally, when the import progress ends, you can run the simulation. You’ll see the actors moving through the scene exactly how they do inside the anima© Stand-Alone application.
Bonus tip: Time lapse effect
Once inside UE4, the animation of each actor can be tweaked just the same as any other imported scene object (non interactive).
For example, you can increase the play rate of the animation to simulate a time-lapse like the one shown at our anima© version 3 promotional video.
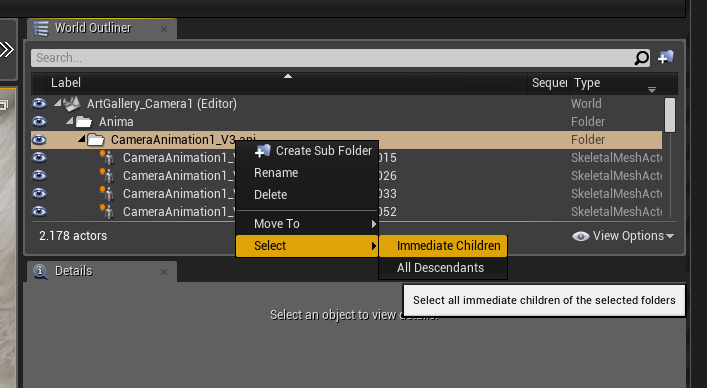
To change this parameter to all the anima© actors you can select all of them using the World Outliner:
- Right click on the anima© folder (project) or any of his subfolders (scenes) and
- Click on Select > Inmediate Children:
Once all of them are selected, you can accelerate the actors changing the play rate parameter to a higher number than 1:
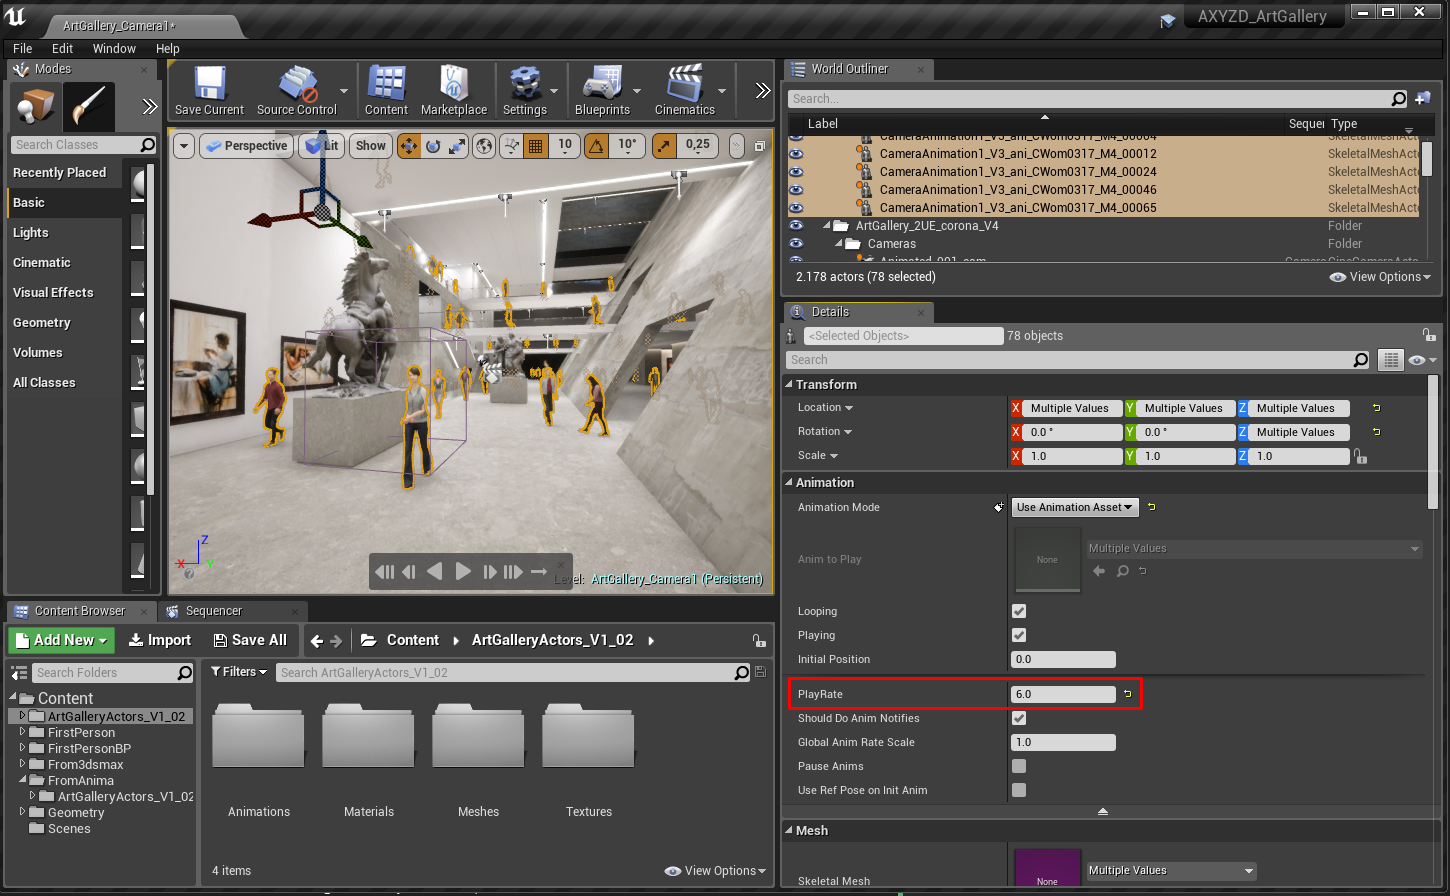
And finally enjoy the result.