The Traffic Light preset is a special type of Area that is used in conjunction with Walkways to stop and start walking or running characters. As the name suggests it is very useful for animations where you need characters to cross roads, but it can be used in any situation where you need to control the movement of actors. There’s no limit to the number of Traffic Light areas that can be created in a scene and with the ability to offset timing it’s possible to create some interesting and sophisticated effects.
Procedures
See the Areas section for general information about changing the size, position and shape of areas. Below you will find only the procedures that are unique for Traffic Light Areas.
To create a Traffic Light Area
Assuming you already have a walkway in your scene, follow these steps:
- Click and drag the Traffic Light Preset found in the Library Presets panel into the 3d viewport and release the mouse.
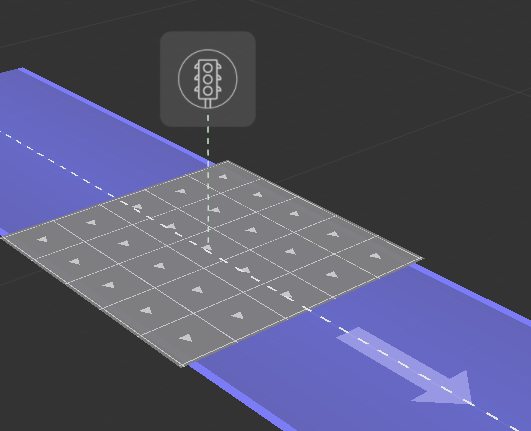
- Move the mouse over the walkway to position the Traffic Light and click to drop the object into the scene.
- To determine the placement of actors while they wait, the Traffic Light area uses a grid based layout. To change the size of the cells, use the Cell Size Placement Grid property.
- The Traffic Light has arrows to indicate the direction the characters will face while they wait. To change the direction either rotate the entire area using the Transform Gizmo or use the Rotate Placement Grid property to rotate the arrows without affecting the area itself.
- To control the timing change the Cross Lamp Frequency value. This parameter controls how long in second the Traffic Light is in its Stop and Go state.
- To decide if the light starts in a Red or a Green state, change the Start Green property. If you create two Traffic Light areas with the same timing and change one to start green and the other to start red, you’ll end up with an offset on/off pattern that can be very useful for intersections.
- Play the animation. While the Traffic Light is red, actors will now wait on the grid cells. When it turns green they’ll start walking again.
Interface
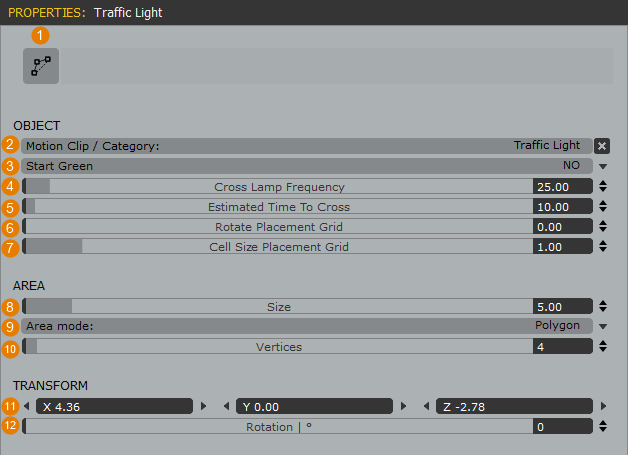
- Refine Area Edge
Click this button to activate the Area Edge refinement tool. Using this you can add and place additional vertices simply by clicking in the 3d viewport. - Motion Clip Category
Used to assign a Motion Clip or Motion Category to the area. - Start Green
Sets whether the Traffic Light starts the animation in a Green or Red state. - Cross Lamp Frequency
Sets the time that will elapse between light changes, measured in seconds. - Estimated Time to Cross
Sets the estimated time in seconds for a character to get across the road. - Rotate Placement Grid
Rotate the placement grid. Note that the placement grid is rotated inside of the area shape. - Cell Size Placement Grid
Set the cell size of the placement grid. Use this value to increase and decrease the size of the squares. - Size
Sets the the length and height of a polygonal area, or the radius of a circular area - Area Mode
Sets the area shape. Choose from Circle or Polygon. If polygon is selected the shape will be an nGon that uses the vertex count value to determine the number of sides. - Vertices
Sets the number of vertices for a polygonal area. - Translation
The position in world space of the area. You can use these values to adjust the position, or alternatively you can use the selection tool in the 3d viewport. - Rotation
The rotation of the area. When using Focus Mode > Grid, this will also determine the direction the characters are facing.