In addition to being able to extend anima® with additional Characters, you can also import your own motion clips. Motion clips should be applied to an anima® compatible rig and imported using the FBX format.
To import motion clips in anima® they will need to to be applied to a rig that matches the conventions expected by the importer. Please see the Importing Characters documentation for the full rig specification and procedures for creating the correct structure with Biped. You’ll also find ready-built rigs you can use to import motion clips on our website.
Procedures
To prepare a Motion Clip Using Biped or a Generic model
- Open 3ds Max.
- Either create a biped rig using the instructions in Biped Creation Workflow, load the Generic Male or Generic Female characters included in the anima® download, or use a Metropoly ready-rigged character.
- Select any bone and open the Motion Panel.
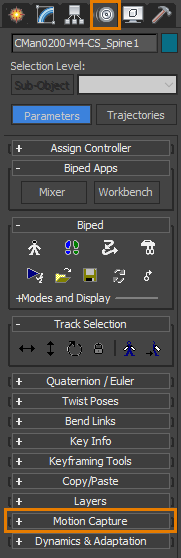
- Open the Motion Capture rollout.
- Click Load Motion Capture File.

- Select a motion Capture file and click Open.
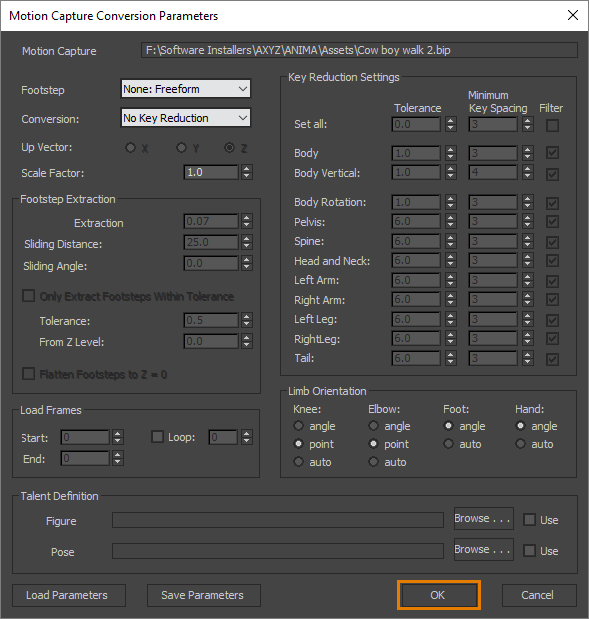
- The Motion Capture Conversions dialog will open. In most cases the defaults are fine and you can just click OK.
- Scrub the timeline the see the animation on your rig. If you’re happy with it, go to Export
- Change the Filetype to FBX and enter a name for your file. This name will also be used for the asset in anima® but it can be changed later if you prefer.
- Click Save.
- The FBX Options will open. Select the Autodesk Media & Entertainment preset.

- Open the Animation > Bake Animation rollout and set the Start and End parameters to match the length of your motion clip.

- Click Save. Your motion clip is exported to FBX format ready to use in anima®!
To prepare a Motion Clip using Mixamo
Mixamo is an online service for automatically rigging characters and preparing and downloading Motion Clips. It is currently free for anyone with an Adobe ID. By uploading an anima® compatible character you can use Mixamo’s motion clips out of the box, with no need to convert them in 3ds Max or Cinema 4d. To do this:
- Go to your Mixamo account, or sign up if you don’t already have one.
- Go to the Store and click on Upload.

- Upload a rigged anima® compatible file, this could be the Generic Male or Generic Female characters included in the anima® download, a Metropoly ready-rigged character, or your own character created using the instructions in Biped Creation Workflow.
- Click Make This My Current Character to preview and download motion clips using this rig.
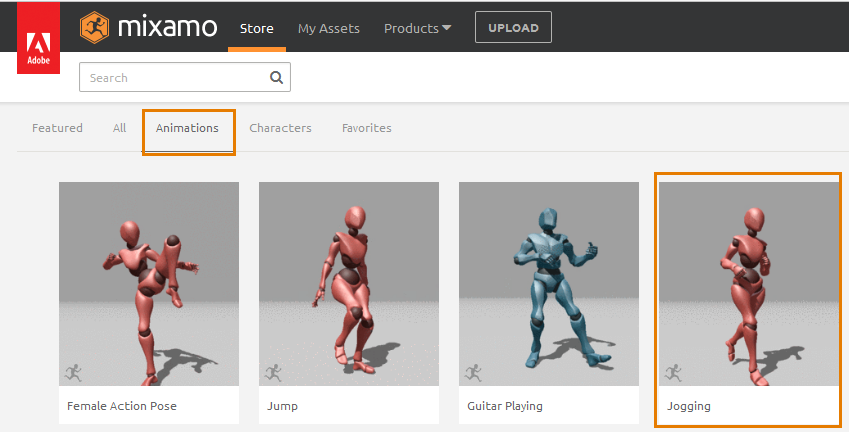
- Go to Animations and choose a motion clip you’d like to import into anima®. In this example we’ll choose Jogging.
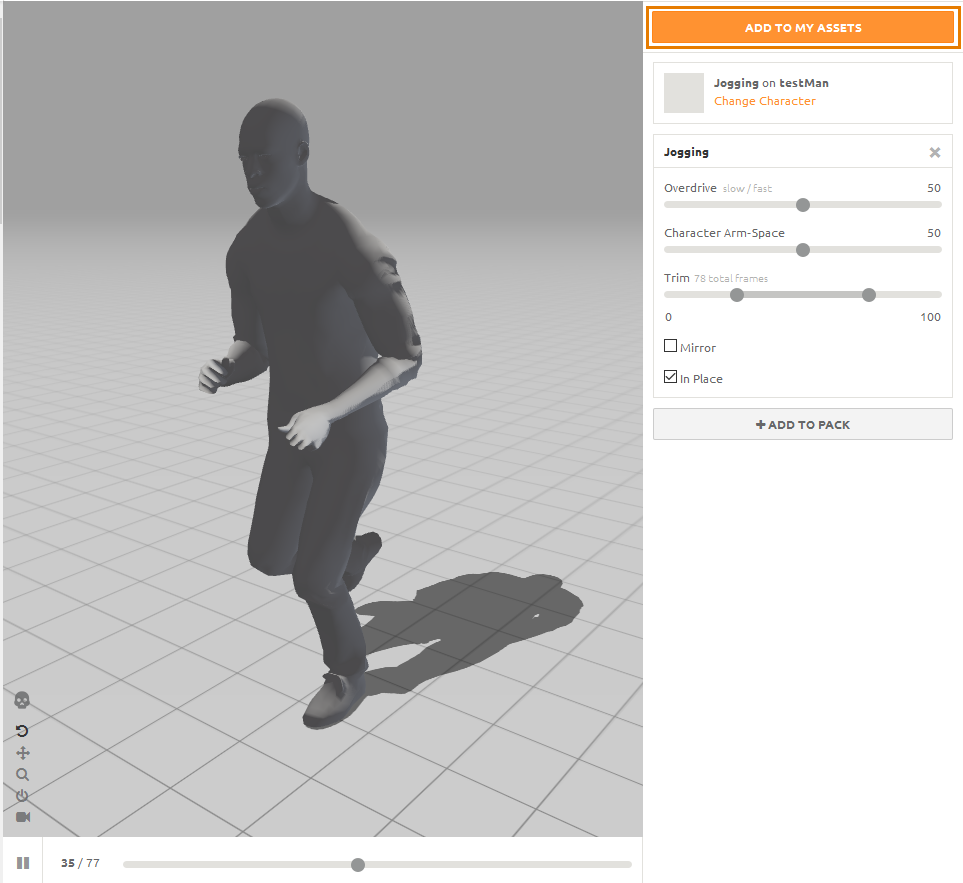
- A side bar will open showing a preview of the selected motion clip on your uploaded character. From here you can make some adjustments to the animation and when you’re happy with it, click Add Asset to Library.
For animations that will be used inside anima® inside any of the Locomotion categories (to walk or run along Paths), you’ll need to unselect the “In Place” checkbox, otherwise you won’t be able to detect the animation loop inside anima®
- Click View/Download and then Queue/Download.
- From the Download Settings choose FBX as the Format and Without Skin, as we only want the motion clip.
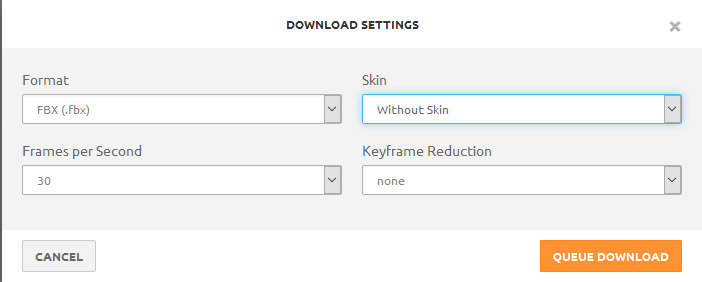
- Click Queue Download the file is now available in your Downloads section. Click Download to get an FBX file that can be imported directly into anima®!

To import a Motion Clip into anima®.
To import one or more motion clips into anima®, follow these steps:
- Open the Project to which you’d like to add Motion Clips and change the anima® UI Mode to Editing.
- In the Motion Clips Library click the + button.
- The Import Clip menu will open. Click on the Input File Picker and select and FBX file containing a motion clip on a correctly rigged skeleton.NOTE It is possible to batch import multiple FBX files at once. Just select them in the picker and click Open to continue
- Set the File Units, in most cases you can leave this set to Auto, but if you find the character’s scale is incorrect this can be set manually.
- Add a Description if necessary.
- Click Save to Import the file.
NOTE If your bones do not follow the naming conventions accepted by anima®, a dialog will open asking you to manually map the bones. Just drag each of the bones on your rig to its counterpart in anima®’s internal rig and click Save to continue.
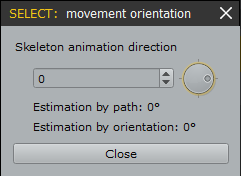
[screenshot pending] - The Movement Orientation options will open. These are used to tell anima® the direction the actor is facing in the motion clip. In most cases anima® will estimate this correctly but you can also set the value manually if necessary.
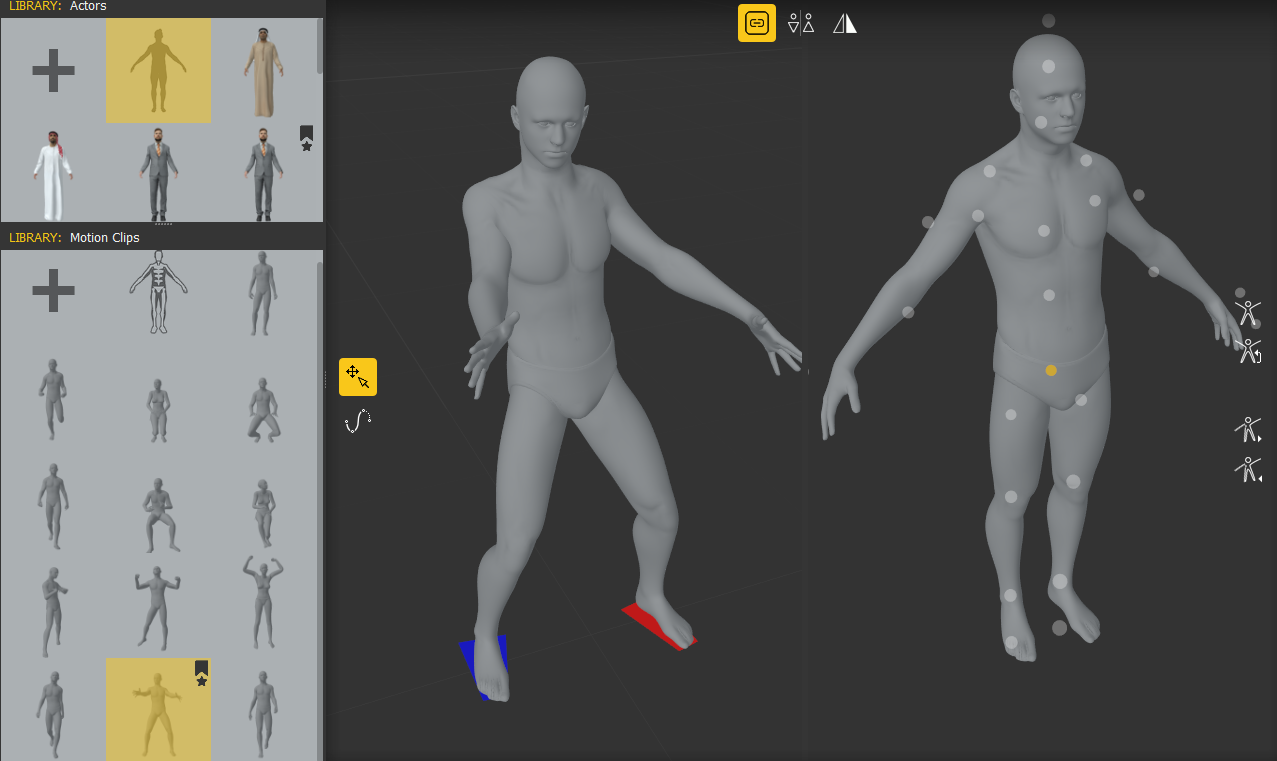
- Your new animation will now be available in the Motion Clips Library.
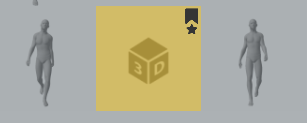
- New clips don’t have a thumbnail. To generate one, go to the Clip Information panel and click
 to create a snapshot. You can also add a Description or edit the Name from this panel.
 - To control the start and end point of the Motion, use the Clipping Markers on the play bar.

- If necessary, adjust the Foot Land-In Speed marker. This parameter controls the speed speed threshold for a foot to be considered in contact with the ground. anima® uses these points to build the locomotion of characters from motion clips. In most cases this is detected automatically.
- Set the Loop Type, cycle will continuous play from beginning to end. Ping Pong plays the clip backwards then forwards.
- Set the Clip Type, use Standing/Walking for characters on the feet and Sitting for seated characters.
- Set the Motion Category and Tags. Motion Categories allow you to classify and create groups for types of movement. Tags allows you to control which characters the movement can be applied to. Please see the Using Categories and Tags page for more information.

- Click Save once your finished editing. Changes to motion clips are available in all scenes within a project.
NOTE Remember to adjust poses for the new motion clip if necessary. Please see the Adjusting The Poses of Actors for more detailed information